

Two gears, two reaches
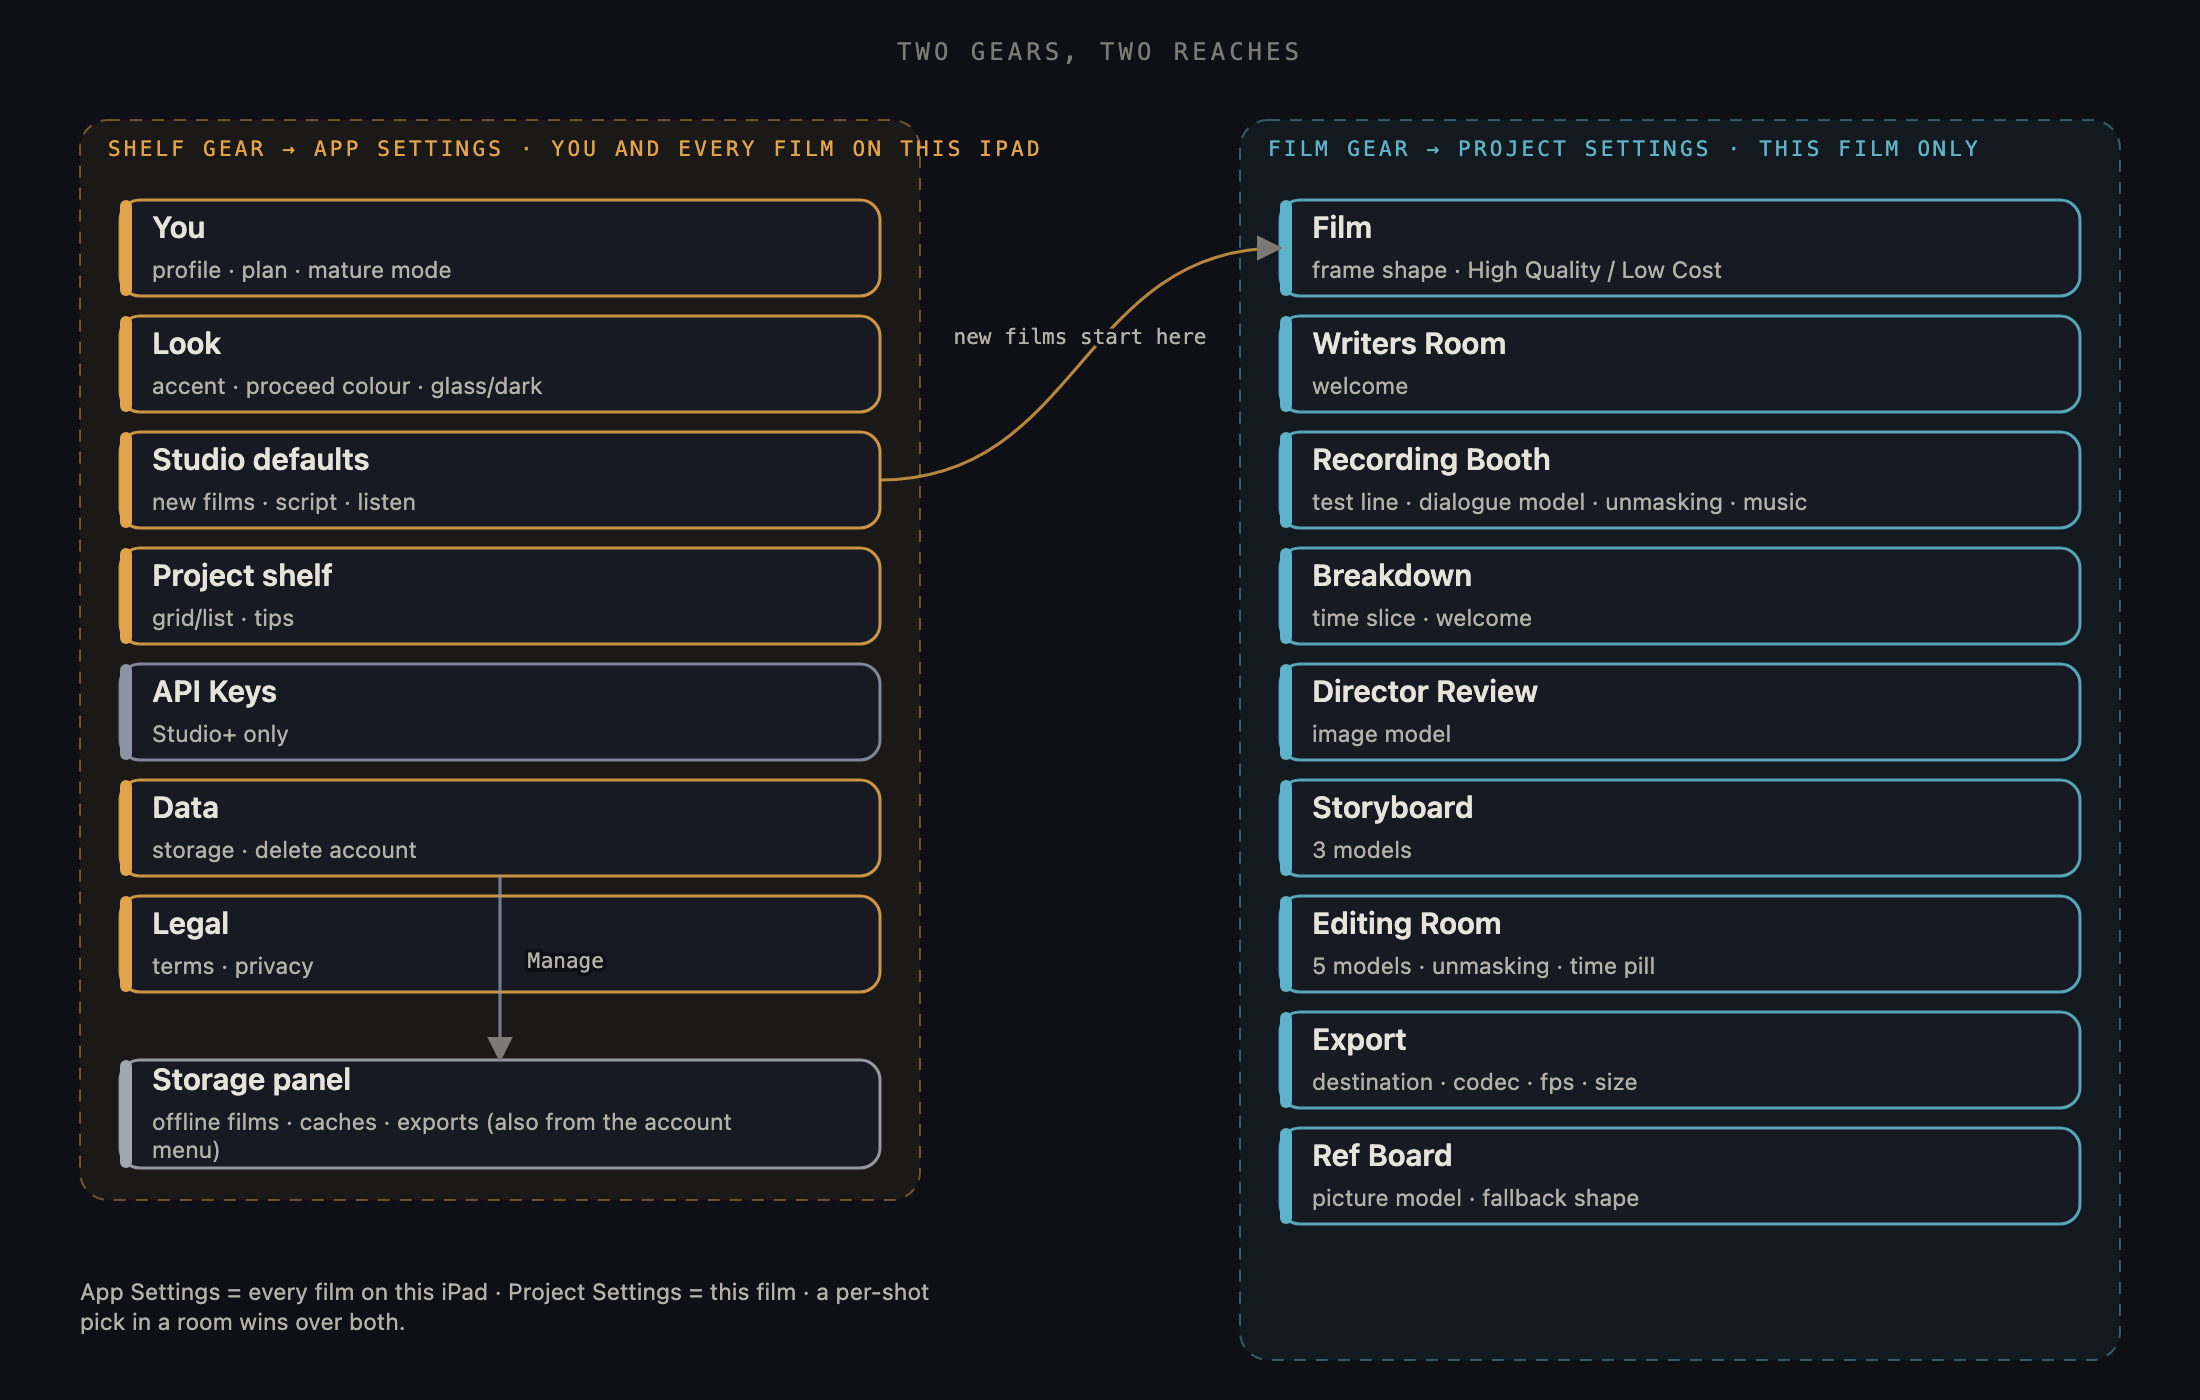
The two gears and what each one reaches. Left: the shelf gear and the seven App Settings sections, which apply to you and every film. Right: the in-film gear and the nine Project Settings panes, which apply to this film only. The Storage panel hangs off both the Data section and your account menu.
1 · You
Your account. The Profile card shows your picture, name and email (a green check means the email is verified); tap the picture to choose a new one from your photo library. Under What to call you, type the name you want Ozu to greet you by and save it. It does not have to be your real name; Ozu uses it in the app and in email. Plan & Credits shows your plan and the credits you have left. Change closes Settings and opens Plans & Credits, where you can move plans or buy a pack. Content holds Mature mode: switch it on and iOS asks you to share your age range to confirm you are 18 or over (your birthdate is never shared with Ozu); if the check does not allow it, a note says why and Check again asks once more. About shows your user ID and the app version. Log Out signs you out on this iPad. Support and reporting live in your account menu under the avatar, not here.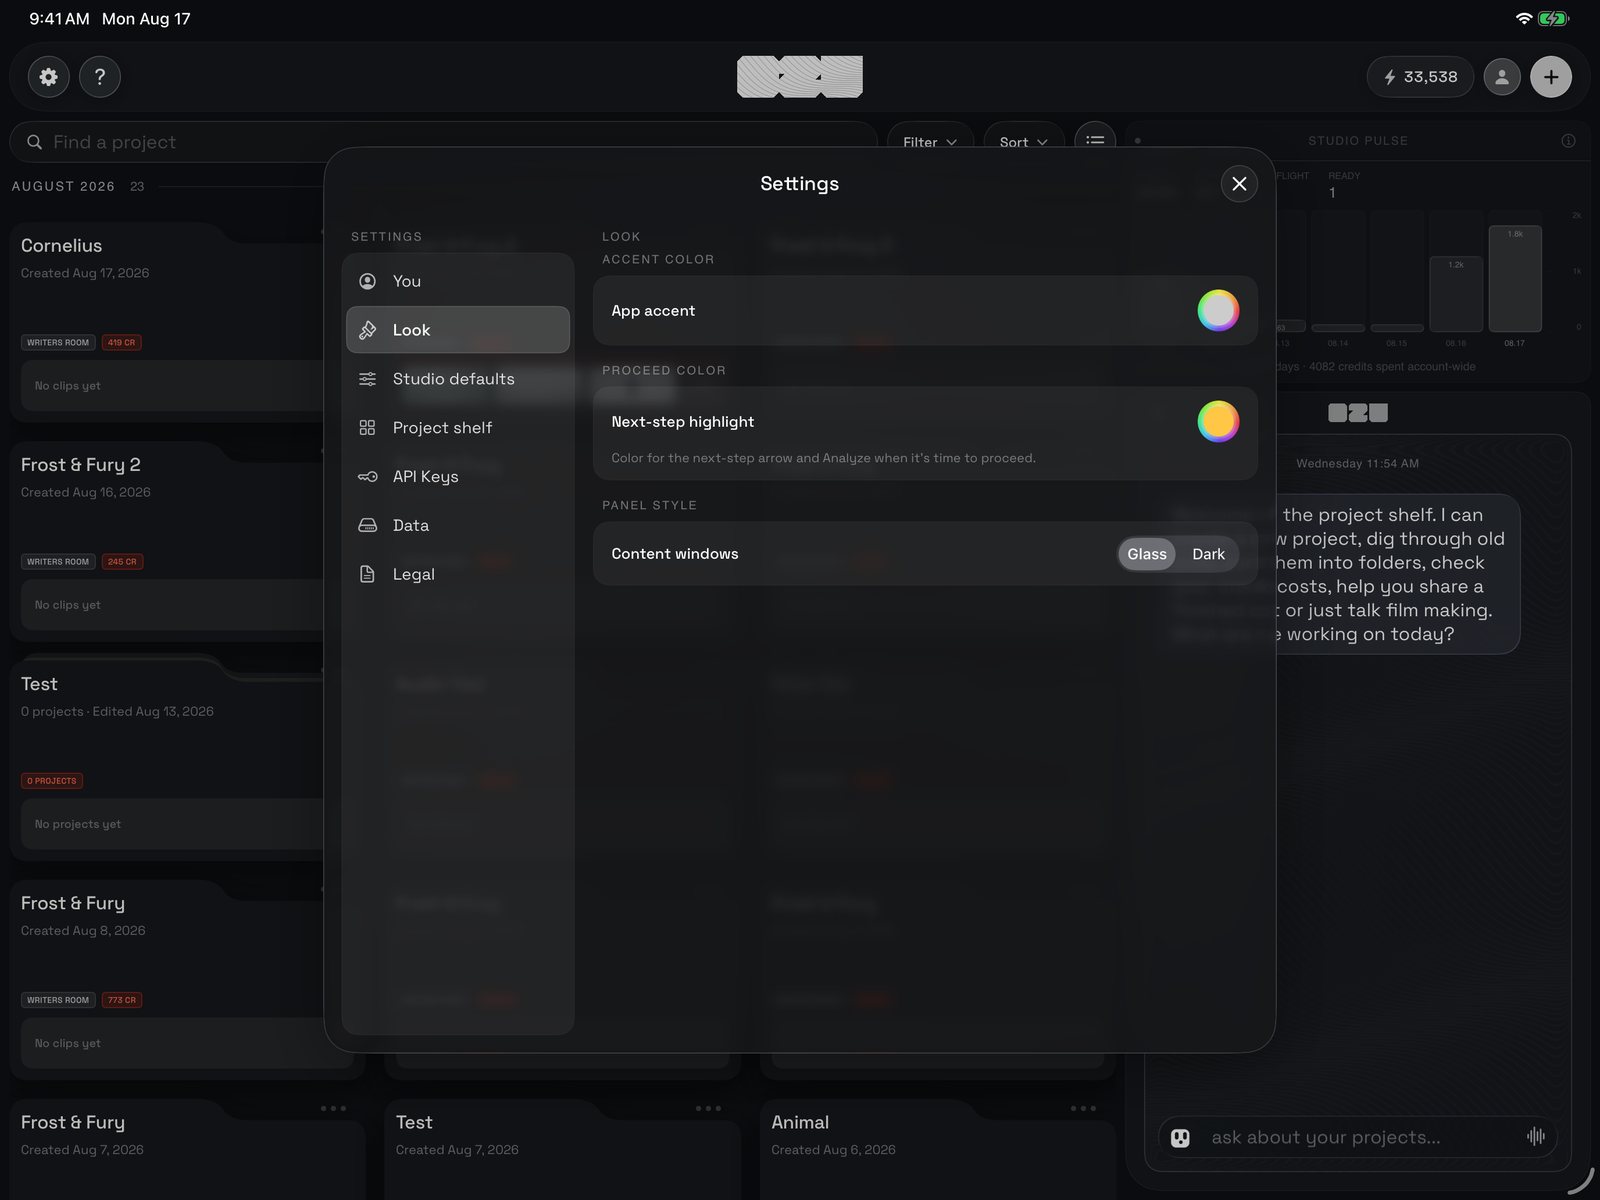
App Settings open on Look: the seven sections down the left (You, Look, Studio defaults, Project shelf, API Keys, Data, Legal) and the Look pane on the right.
2 · Look
How the app is drawn. The accent colour is the highlight you see in every room; once you change it, a Reset appears beside it. The proceed colour is separate on purpose: it is what the next-step arrow and Analyze light up in when a room is ready for you to move on, so pick something you notice; it has its own Reset. Panel style draws Ozu’s windows as see-through glass or flat dark panels.3 · Studio defaults
Standing choices every film starts from. New films sets the Generation level, High Quality or Low Cost, and the frame shape that films you create after this begin with; each film can change both in its own Project Settings. Script is how you write, on every film: the typeface you type in (formatted pages stay Courier), the type size, and the old-school block cursor. Listen is who reads your script aloud. Ozu’s voice by default decides whether Read Script uses Ozu’s voice, which spends credits and is much easier on the ears, or the free voice on this iPad. Pick which of Ozu’s voices you prefer; each has a one-line description under the menu. The free voice menu lists the iPad’s built-in voices, and the note under it says where in iOS Settings to install more at no cost. What these do while you listen is in Read Script.4 · Project shelf
Grid or list is the view the shelf opens in; the toggle on the shelf still flips it any time. Show tips again clears every “don’t show again” you have ticked, so each room’s first-time welcome plays once more.5 · Your own keys
Only on the Studio+ plan. Studio+ has no credits: you connect your own accounts with the companies whose AI models Ozu uses, and pay them directly. Each row is one company, with a note on what it does for your film and a status light (Not set, Saved, Checking, Connected, Invalid key). Get a key opens that company’s website; paste the key in and tap Save. It is stored encrypted on this iPad and checked straight away. A saved key shows masked, with Replace to paste a new one over it (Cancel keeps the old one), Remove to delete it, and Re-check to test it again.6 · Data and Legal
Data has two rows. Storage & caches › Manage closes Settings and opens the Storage panel (next). The Danger zone holds Delete account: you type DELETE, and your account, films and credits are removed for good. Exporting a film’s own data lives on that film’s Export step, not here. Legal is the Terms and Privacy Policy, readable in place.7 · The Storage panel
What Ozu holds on this iPad, in three buckets, each with a size. Offline Projects lists every film you have made available offline; Unpin stops keeping that film, so its media becomes ordinary cache. Caches is the pictures, video and audio Ozu has downloaded to show you; Clear Caches frees that space and Ozu re-downloads what it needs, when it needs it. Offline films are never touched. Exports lists every file you have exported: the bin deletes one, Delete All asks first and deletes them all; anything already shared or saved to Photos is unaffected. The foot line is the total. Your account menu opens this panel too.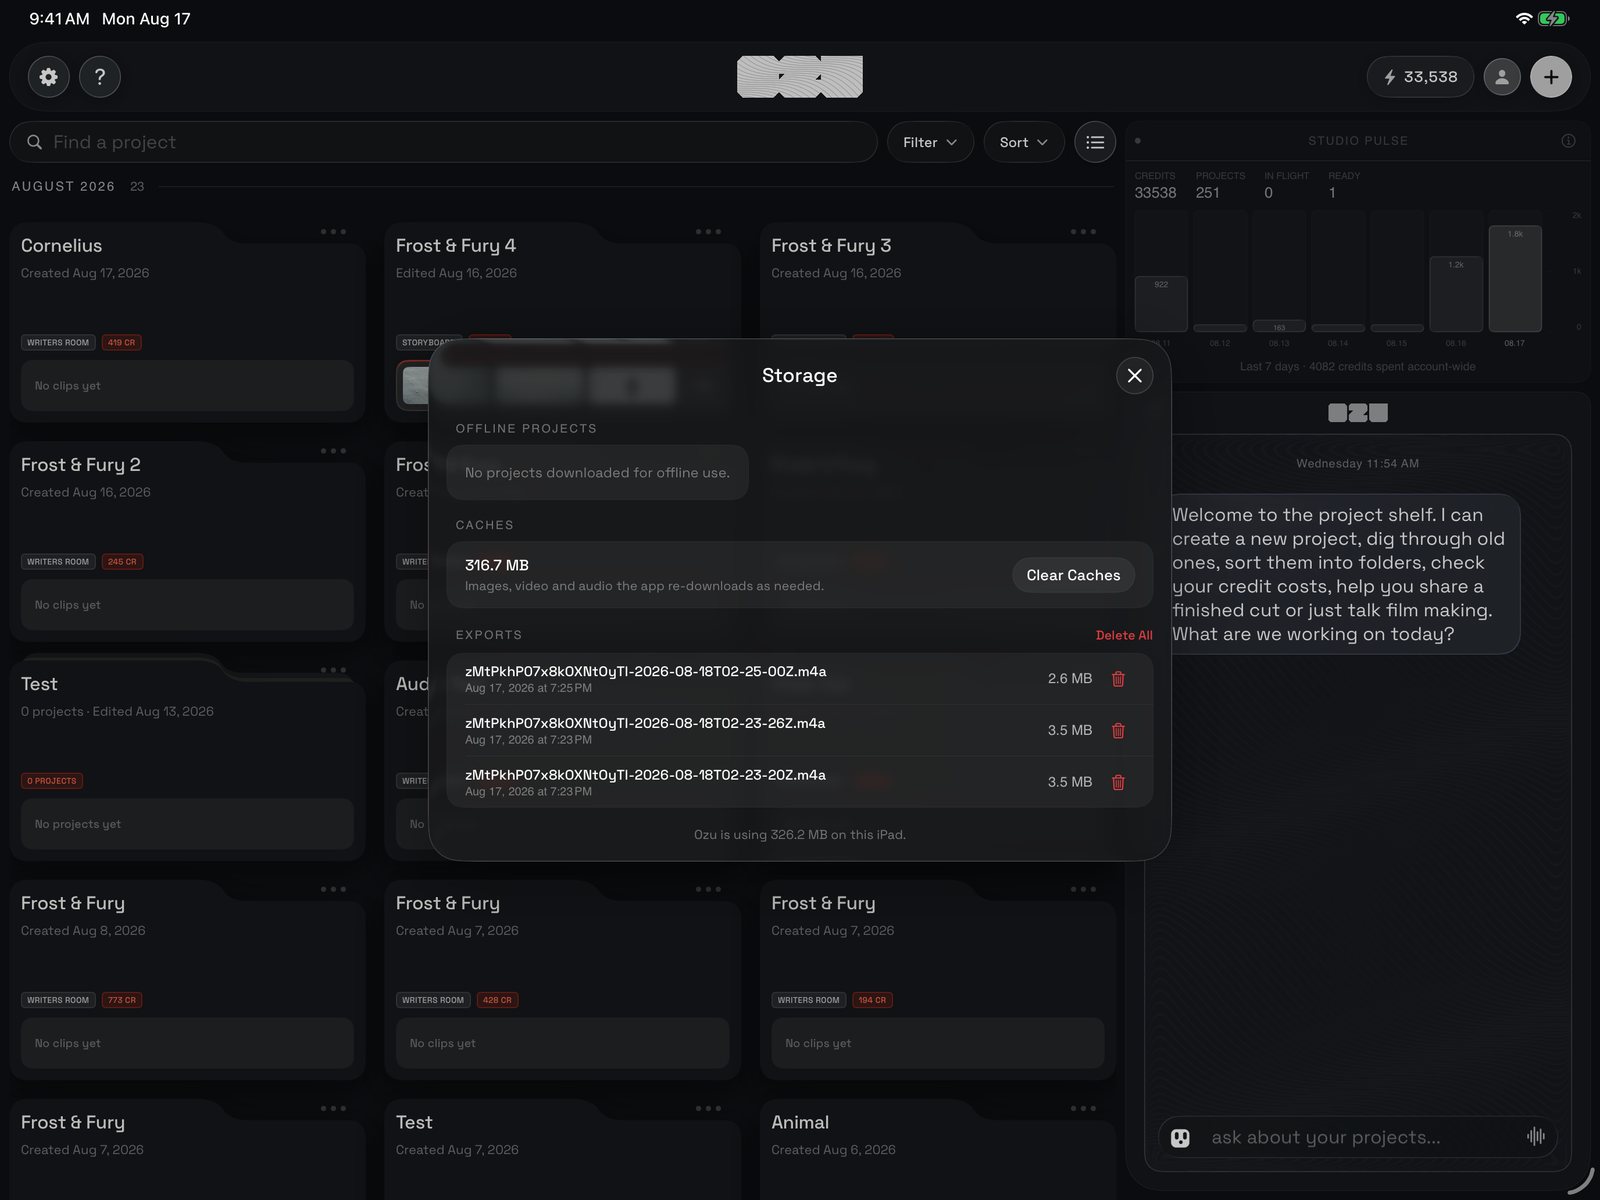
The Storage panel: offline projects at the top, the cache with Clear Caches, the list of exports with a bin on each, and how much Ozu is using on this iPad.
8 · This Film
Now the other gear, inside a film. Project Settings lists places on the left and shows that place’s rows on the right, with a line at the foot saying what the pane governs. Film comes first: the frame shape new stills and clips are made in (widescreen, standard, square or portrait) and the film’s Generation level. High Quality uses the usual models; Low Cost swaps in the cheaper set everywhere at once. Shots already made keep the shape they were born with.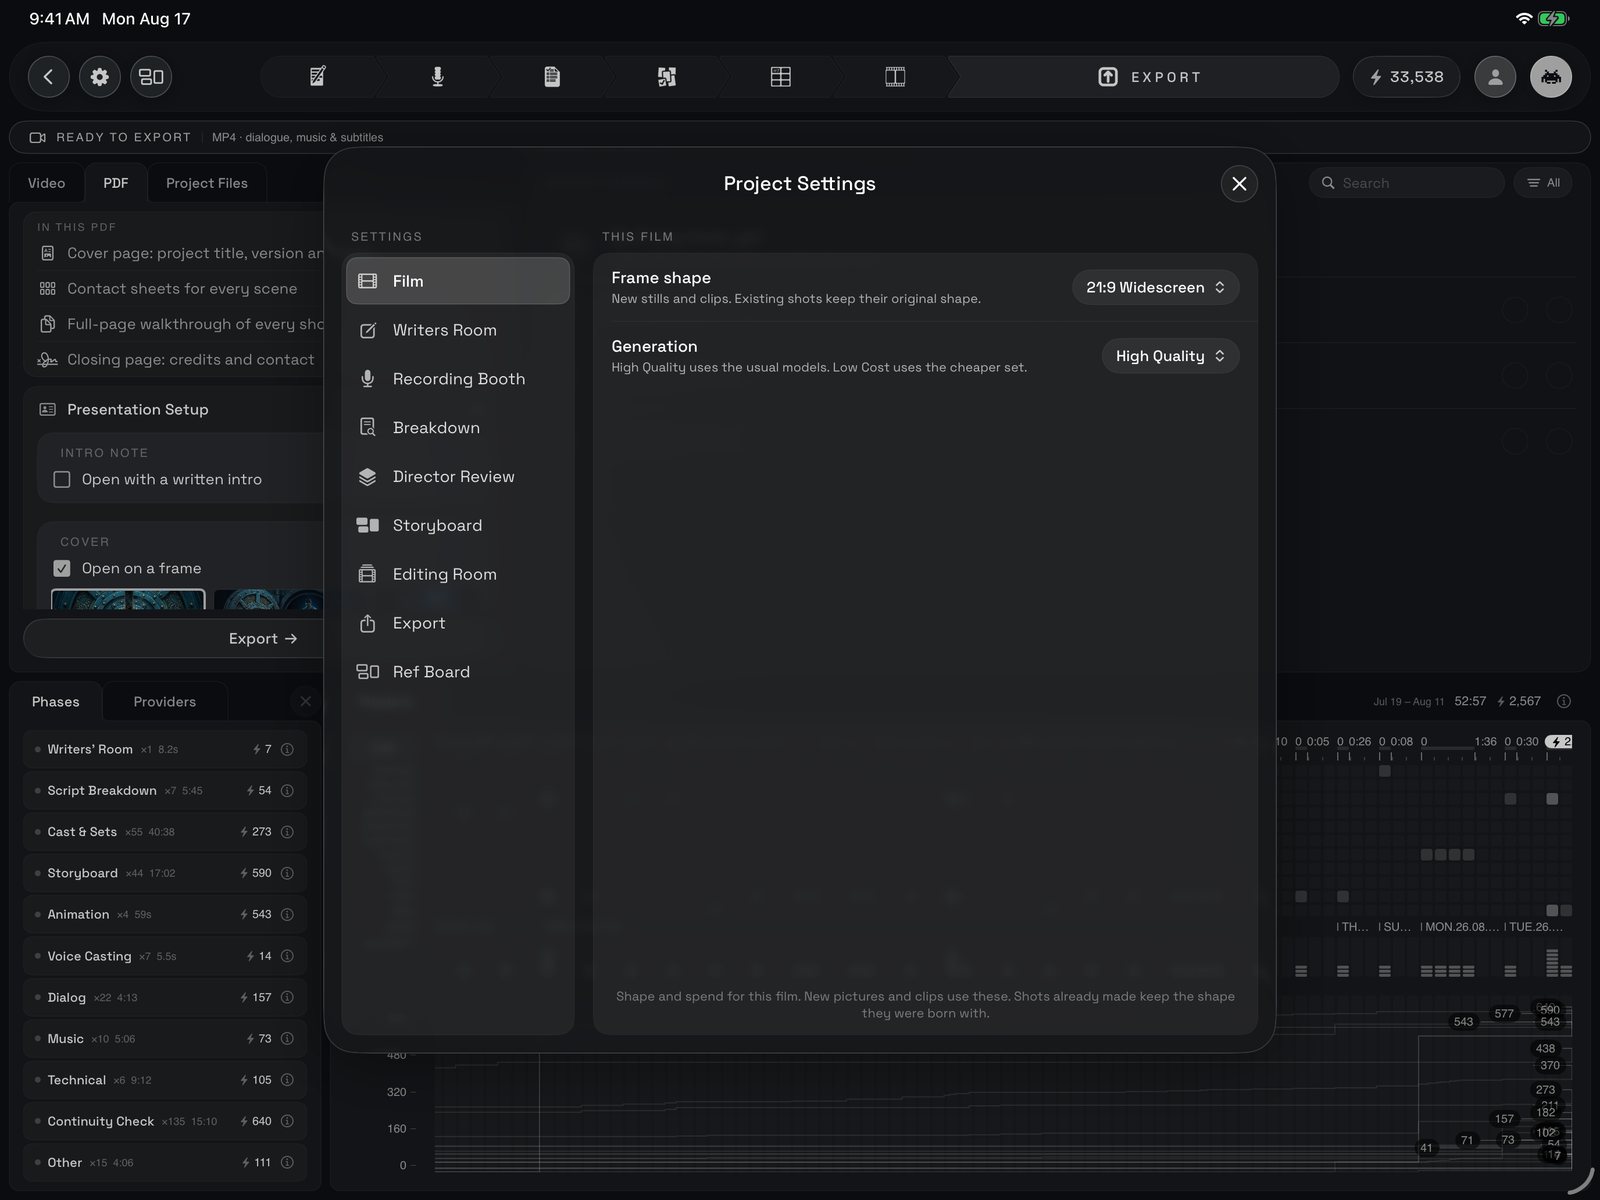
Project Settings open on Film: the nine panes down the left (Film, Writers Room, Recording Booth, Breakdown, Director Review, Storyboard, Editing Room, Export, Ref Board), and Frame shape and Generation for this film on the right.
9 · Writers Room and Breakdown
Two small panes. Writers Room has one row, Show again, which brings the room’s first-time welcome back on this film (type and listen choices live in Studio defaults, because they follow you across films). Breakdown sets the time slice: how much time one square of the pipeline chart holds, from ten seconds to five minutes. The pane notes that this governs the Export pipeline chart, while the Breakdown and Dialog charts stay at ten seconds. Its own Show again restores the Breakdown welcome.10 · Recording Booth
The booth’s standing choices, in the order of its tabs. Under Voice Casting, actors with a cloned voice are always performed by one fixed voice model, shown as a read-only row. The default test line is what every voice reads at audition unless an actor has its own line; Reset goes back to the standard one. Under Dialog, Without reference audio picks the voice model that performs dialogue for actors without a cloned voice. Under Mixing, Dialogue unmasking quietly dips just the part of the music that would sit on top of a voice, so lines cut through without a full-volume drop; Duck strength is how deep that dip goes, greyed until unmasking is on. Under Score, the Music picker chooses who composes. Full write-up: The Recording Booth.11 · Models, room by room
The rest is mostly model pickers. Director Review has one, for the pictures of your actors, props and sets: the first pass Ozu draws right after Analyze Script and every redo on the board both use it. Storyboard has three, for stills, clips and talking clips. Editing Room has five, for stills, clips, talking clips, dialogue and music made from the timeline, plus the same unmasking and duck strength pair as the booth, and Time pill shows frames, which reads the playhead as hours, minutes, seconds and frames instead of decimal seconds. Ref Board has its picture model and a fallback shape for when a generate has no reference picture to copy a shape from. Every picker shows the model’s price beside it, marks each model with what its maker may do with what you send (the marking key), and offers Reset to default once you have picked one.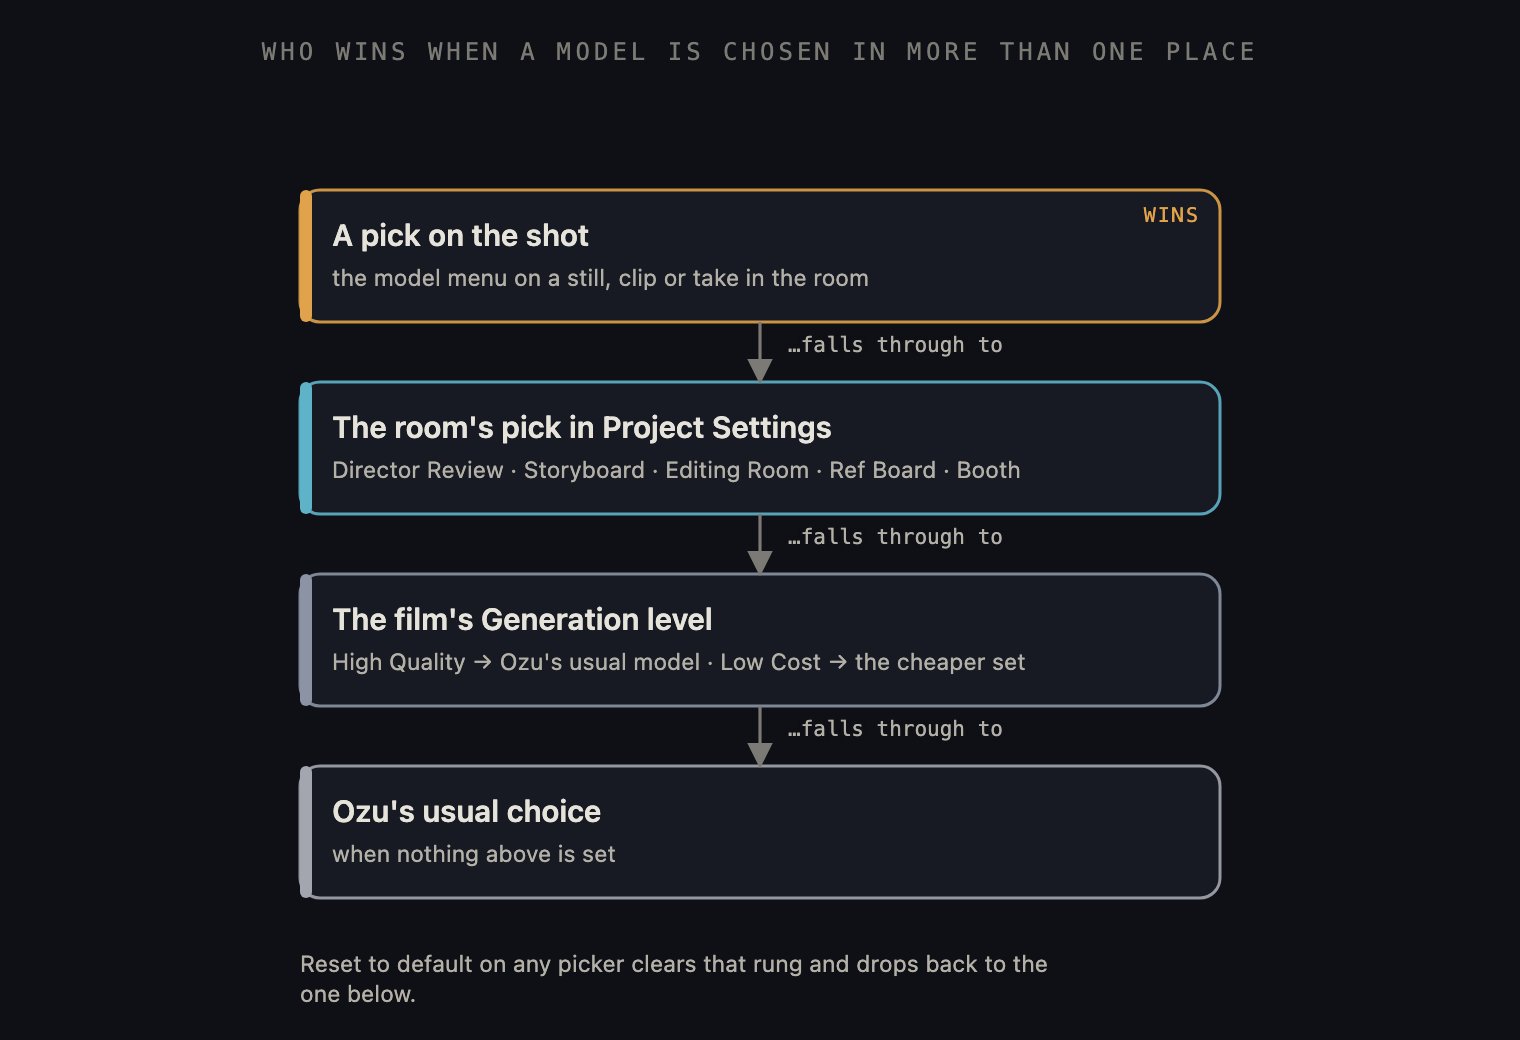
Who wins when a model is chosen in more than one place: a pick on the shot itself beats the room's pick here, which beats the film's Generation level, which beats Ozu's usual choice.