

One strip, top to bottom
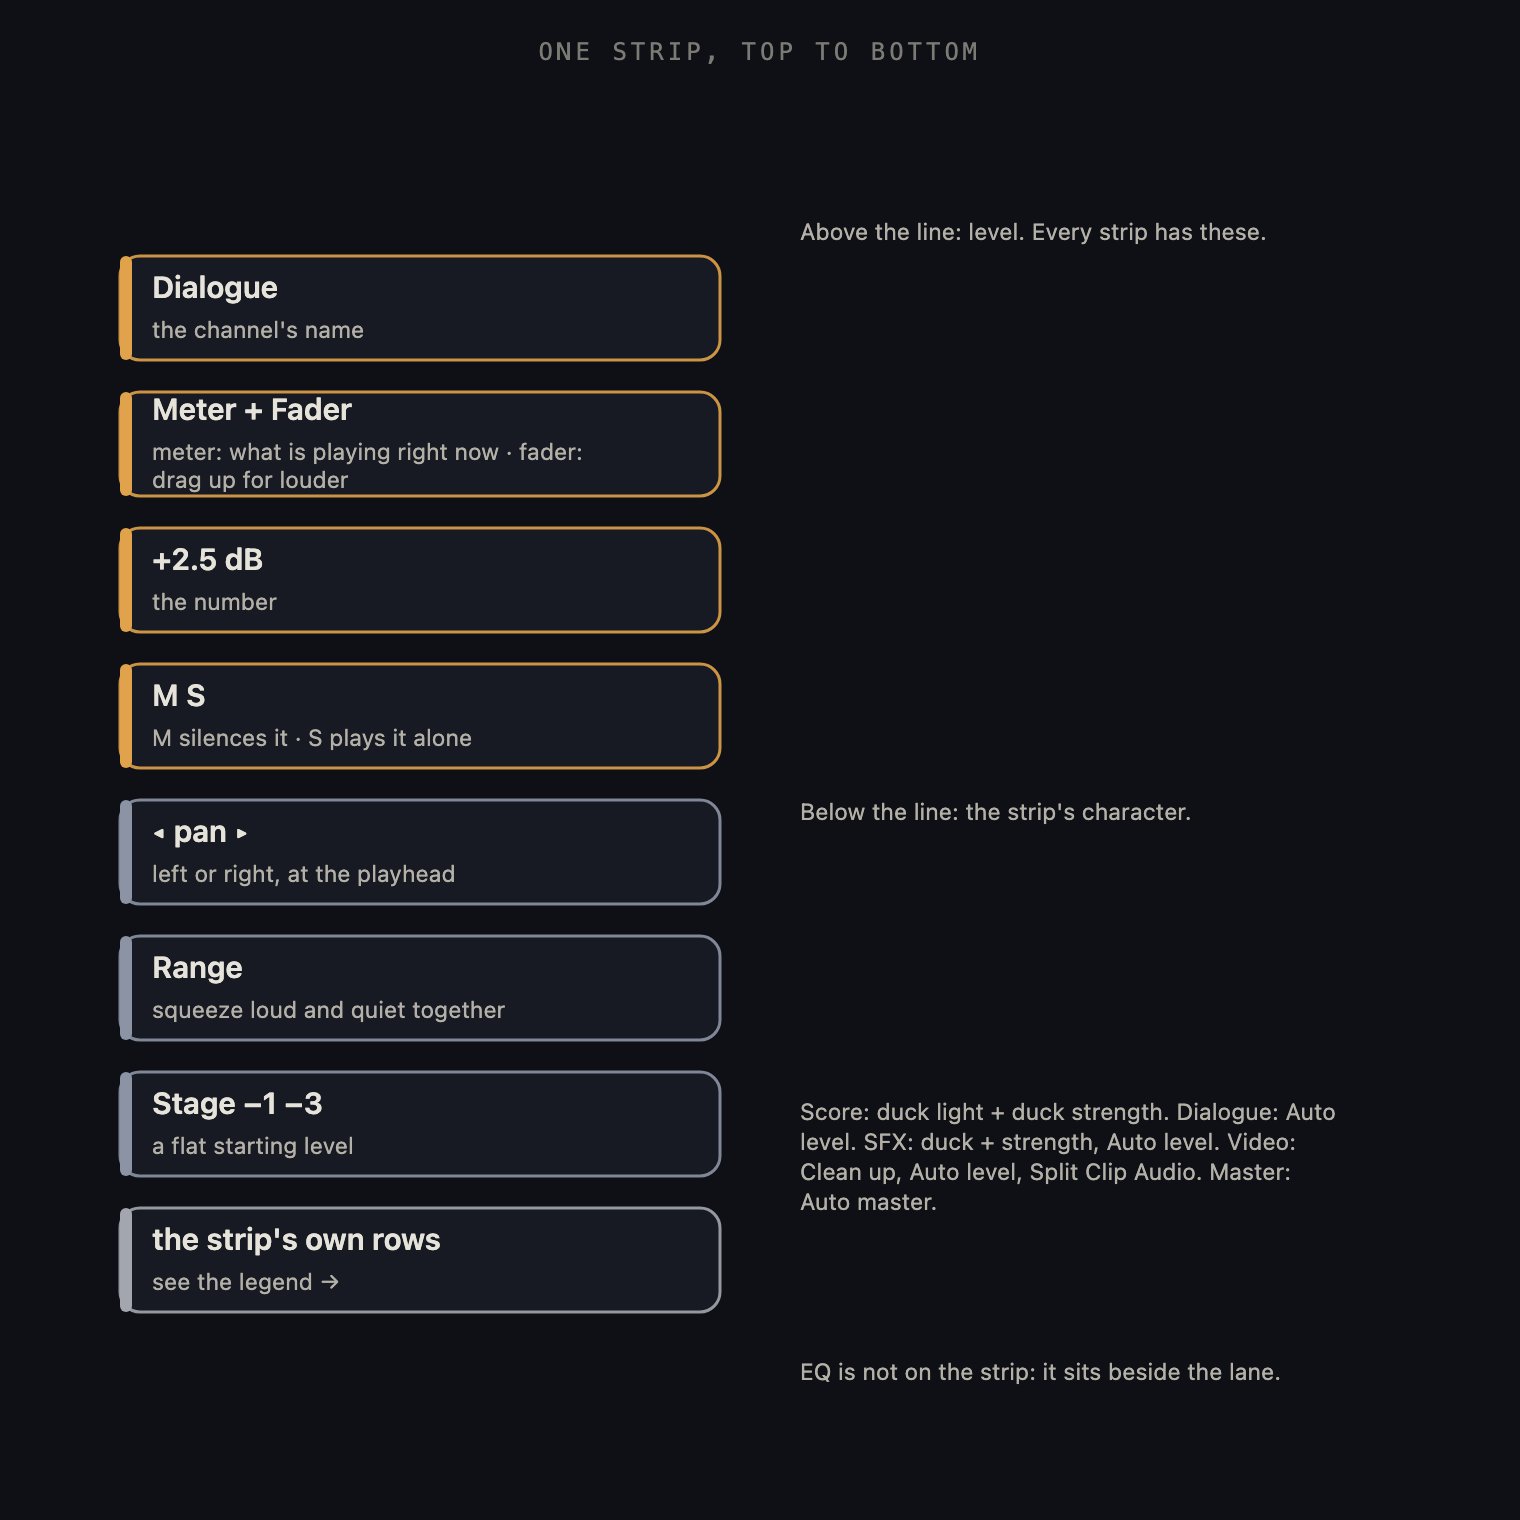
Every strip is built the same way. Read it top to bottom: name, meter and fader, level readout, mute and solo, then the strip's own character controls below the line.
1 · The strips
Left to right the strips are Score, Dialogue, SFX, Video Audio and Master: sound flows left to right into the Master, the way it does on a real console. A strip you have nothing for yet is drawn dim; it wakes up the moment its sound exists. Two faders are shared with the rest of the booth: the Dialogue fader is the Dialog tab’s Gain and the Score fader is the Score tab’s Gain. Move either surface and the other follows. The pan slider places the channel where the playhead is, so a sound can sit somewhere different in different parts of the film; the lanes draw the moves you make. The Range slider is for a channel that swings between too quiet and too loud: slide right and the swings tighten. Stage −1 and Stage −3 listen for the channel’s loudest moment and set the fader so it lands just under full, or a little lower with room to spare: a flat, honest place to start before you balance by ear.
The Master column is the whole film in one strip. Its fader raises or lowers everything, its pan slider tilts the whole mix left or right, its Range slider squeezes the sum, M silences everything, and S clears every solo so you are back to the full mix.
2 · Smart Balance
Under the strips is the button to press first. Smart Balance sets every fader to a sensible starting mix: dialogue clear, music and effects underneath. It is a starting point, not a verdict; move anything afterwards, or tap Undo beside it to have your old levels back exactly as they were. In the Editing Room’s popup this row also holds Soundbooth, which jumps you to the full room, Enhance, which opens the same clean-up list as the Video strip’s light, and the Split Dialog chip. The popup is the strips and this row; the lanes, the EQ and the jog wheel live in the full room.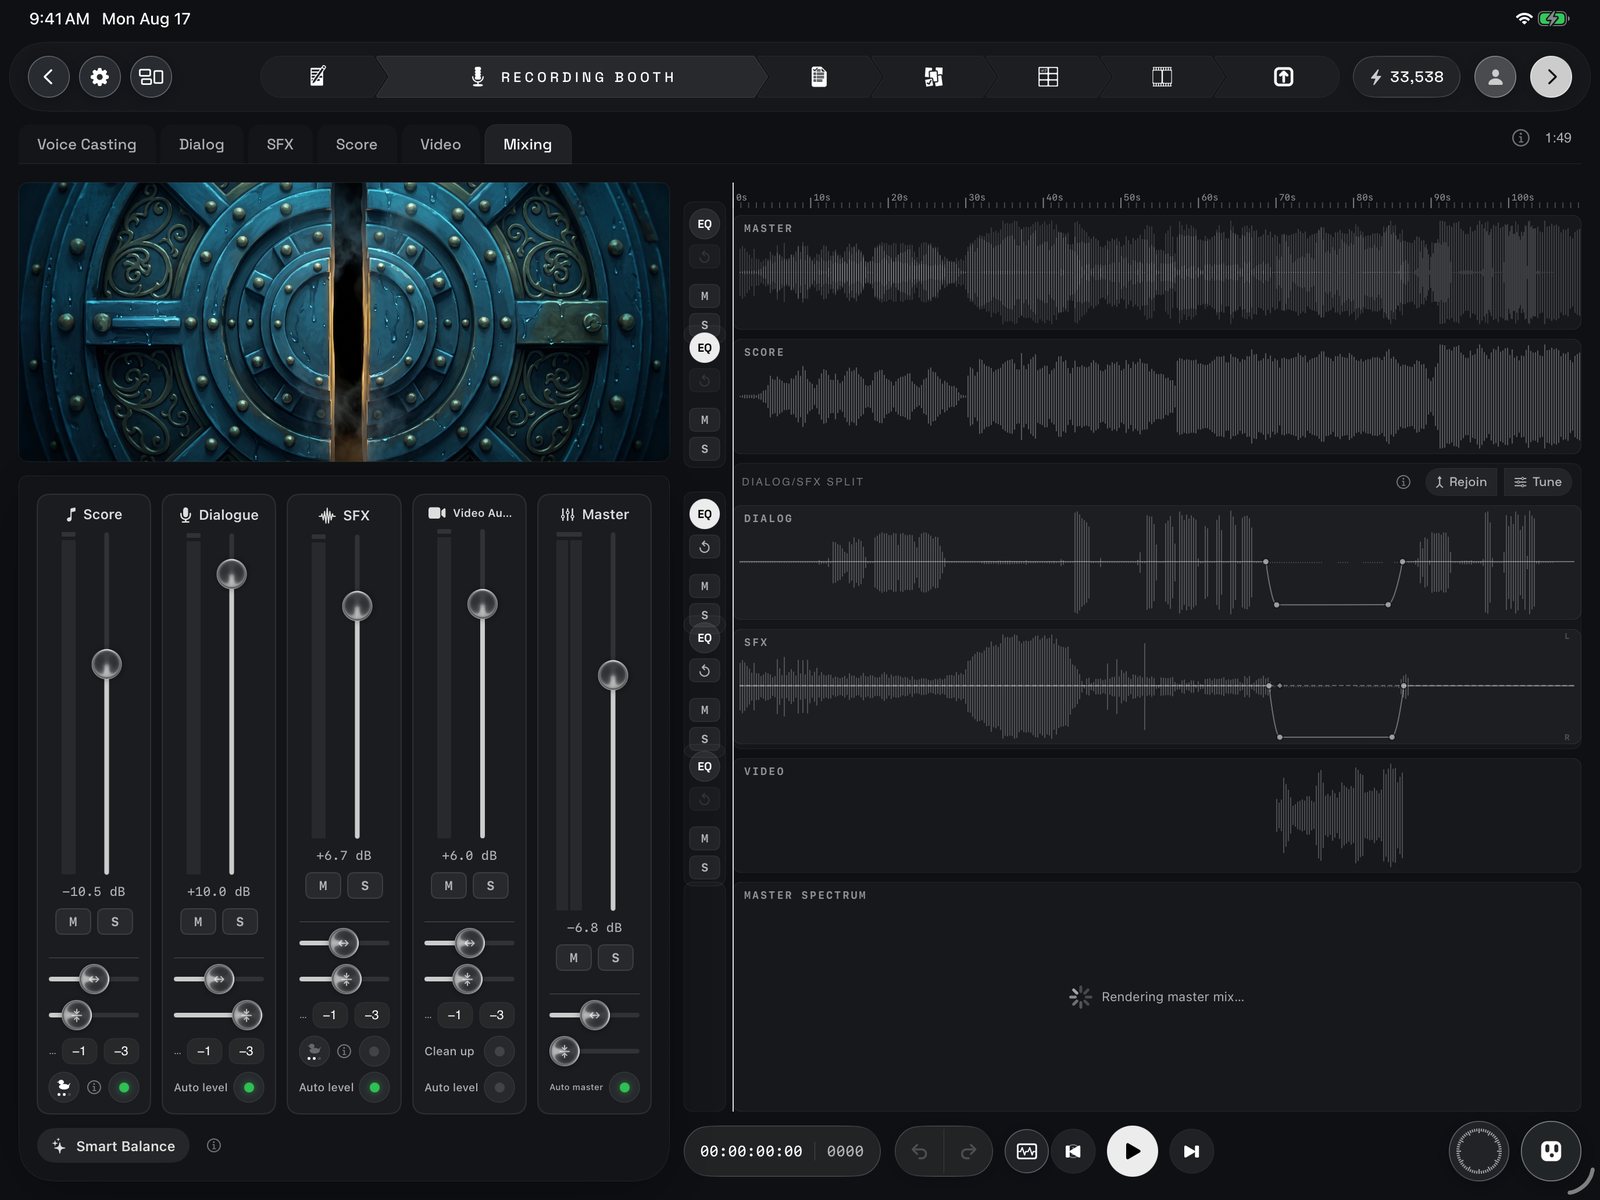
The full room: the picture and the five strips on the left, the lanes with their EQ / M / S tool column on the right (Master, Score, the Dialog/SFX split group, Video, and the master spectrum), the transport and jog puck along the bottom.
3 · The lanes
In the full room the right half of the screen is the lanes: one waveform per channel on a shared time line, a ruler across the top, and a playhead that sweeps everything. Top to bottom they read MASTER, SCORE, a framed group called DIALOG/SFX SPLIT holding DIALOG and SFX, then VIDEO, and, when it is on, the master spectrum at double height. The MASTER lane is every channel overlaid: a picture of what leaves the room. Drag a fader or a Range slider and the waves react as you move. Tap a lane to select it: it brightens, the jog wheel opens, and the wheel’s rings now write to that lane. Drag along a lane, or along the ruler, to scrub; hold a finger still on a mark you rode in to delete it. Touching MASTER clears the selection. To the left of each lane is a small tool column: EQ opens that channel’s tone controls, reset strips every level and pan move from the lane once you confirm, and M and S sit at the bottom again, where a mixer’s hand expects them. The master spectrum is a heat map of the finished mix, rendered the way it will export: time runs left to right, deep sounds sit at the bottom, bright sounds at the top, and louder shows hotter. It comes up on its own when you enter the room; the button in the footer hides and shows it. Use it to spot rumble, hiss, or a gap where sound should be.4 · EQ
Tap EQ beside any lane, the Master included, and a card floats in the middle of the room; play, the jog and the lanes keep working underneath it. The curve at the top is the shape you are giving the sound. Under it are the band faders: up is more of that part of the sound, down is less. The 5 / 10 / 31 chips choose how many bands you want, five for quick shaping, ten or thirty-one for fine work. The preset buttons apply a ready-made curve, and the green dot shows which one is on; Auto sets Ozu’s recommended curve for that kind of channel. Every drag is one undo step.5 · Transport, jog and undo
Along the bottom of the lanes is the transport. On the left, the clock shows where the playhead is; tap it to switch between timecode and a frame count. Beside it are undo and redo for your mix moves, and the spectrum button. In the centre: previous clip, play, next clip. On the right, the jog puck and Ozu. The jog wheel blooms out of its puck. The inner dial scrubs through the film and coasts to a stop when you let go. Select a lane and two rings appear around it: GAIN and, outside it, PAN. Turn a ring while paused and the moment under the playhead loops so you can set it by ear; turn while playing and you ride the level or the placement live. Everything you ride is remembered as marks along that lane, and the strip’s fader follows them during playback. A two-finger tap anywhere in the room undoes the last move.6 · Splitting dialogue from its background
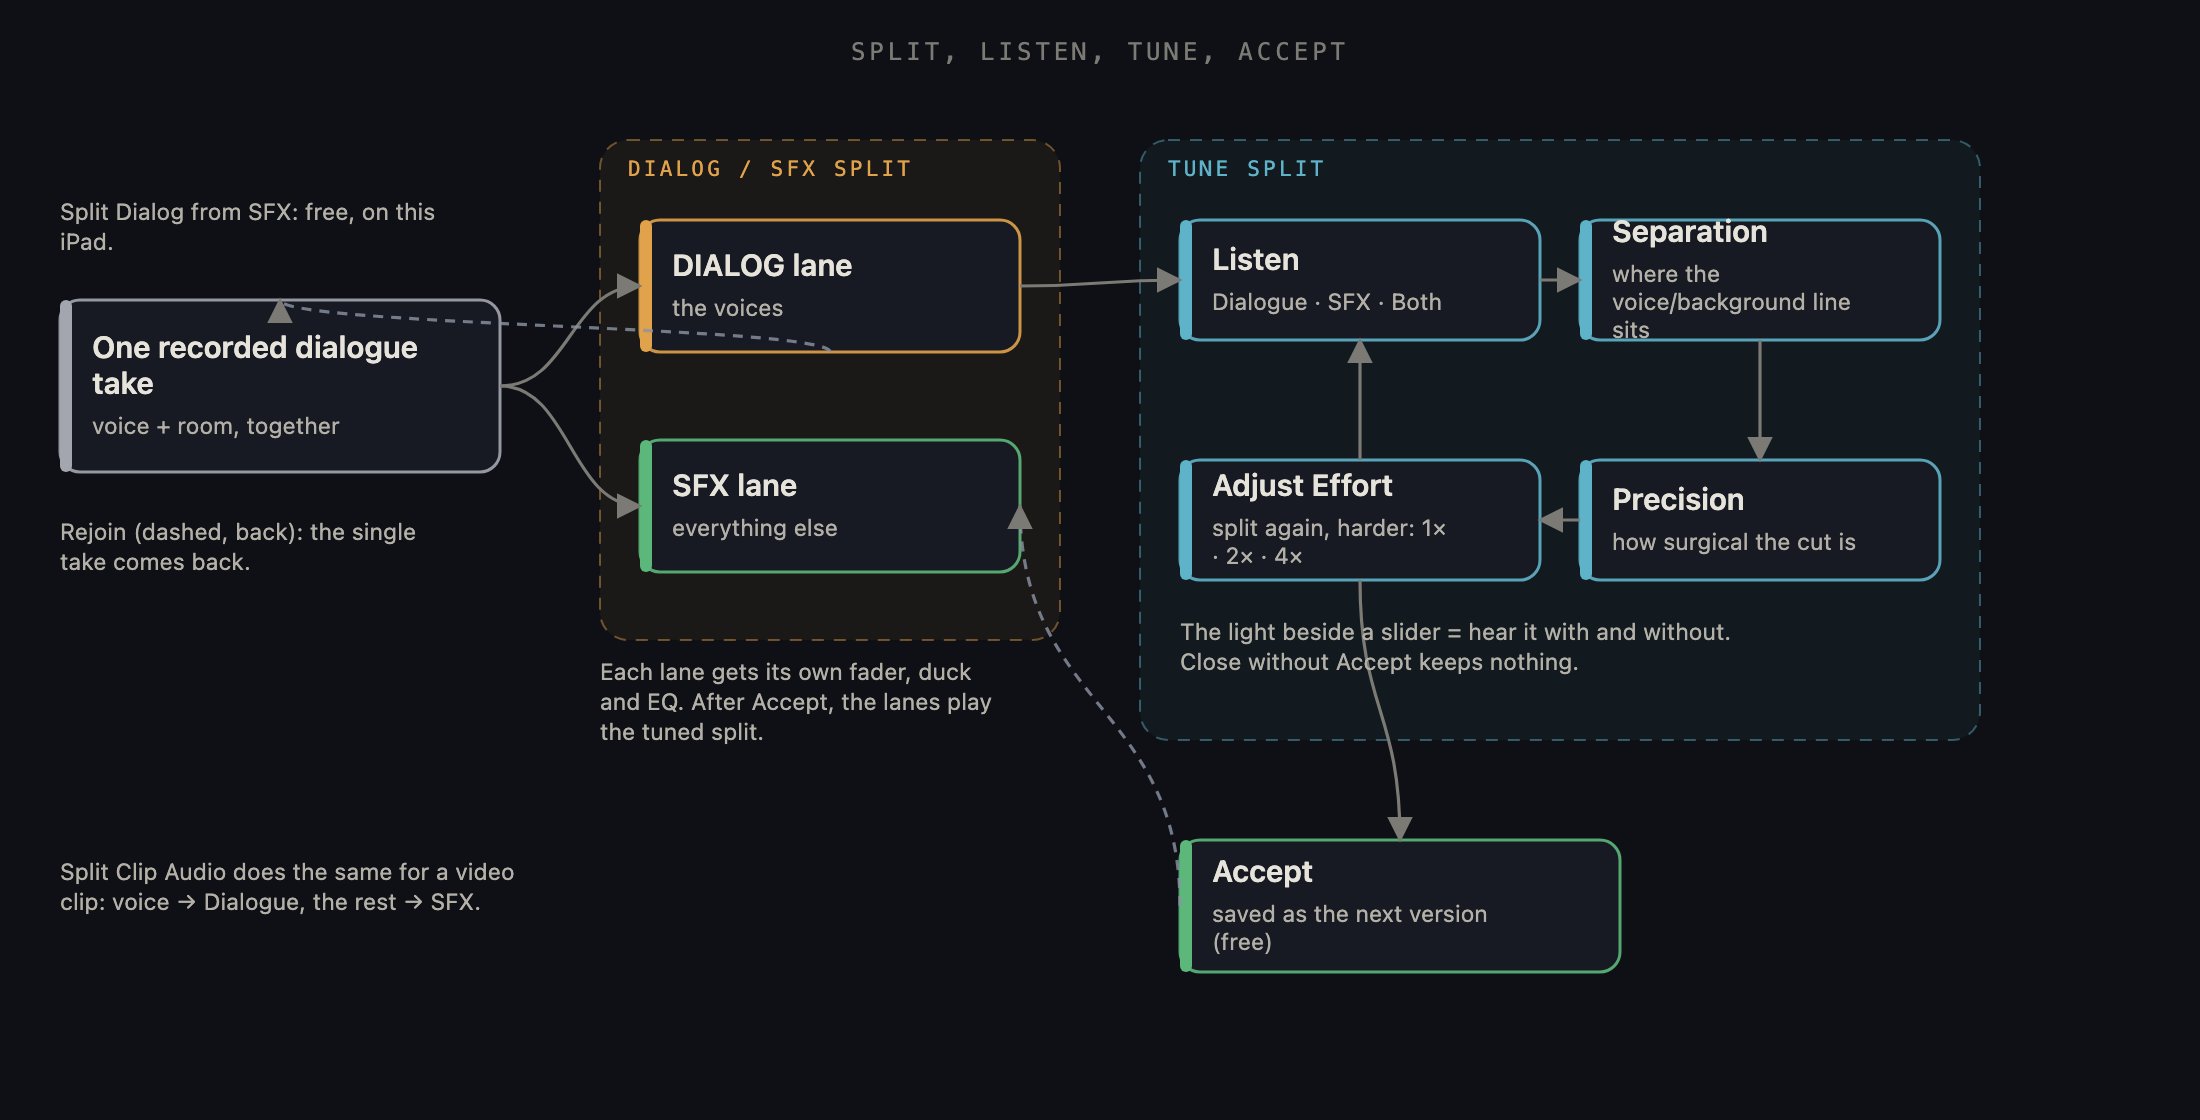
Split, listen, tune, accept: the loop that turns one recorded take into a clean voice track and a background you can mix apart.
7 · Cleaning up video voices
Generated video clips arrive with their own sound, and the Video Audio strip has two tools for the voices in them. Split Clip Audio does for a clip what the split above does for a take: the spoken line moves to the Dialogue channel and everything else in the clip goes to SFX, free and reversible; it acts on the clip under the playhead, and Rejoin puts the clip’s sound back. Clean up is the paid, stronger option: it opens a list of every clip with sound, and each row has a toggle that cleans the voice out of the background noise. The price is on the row and it bills once; turning a cleaned clip off and on again is free, and the original is always kept.What happens next
When the board sounds right, you are done with sound. Every fader, pan, range, EQ, duck and split you set here travels into the file exactly as you heard it; the spectrum you were looking at is the export’s own picture. Head to Export to render the finished film, or back to the Editing Room if the cut still needs work; the popup mixer there is the same board, so nothing you set is left behind.This page mirrors the front page of the in-app guide. Inside Ozu, tap ? on the Project Shelf for the guide, or the ⓘ beside any control for that control’s own write-up.