

How a price is made
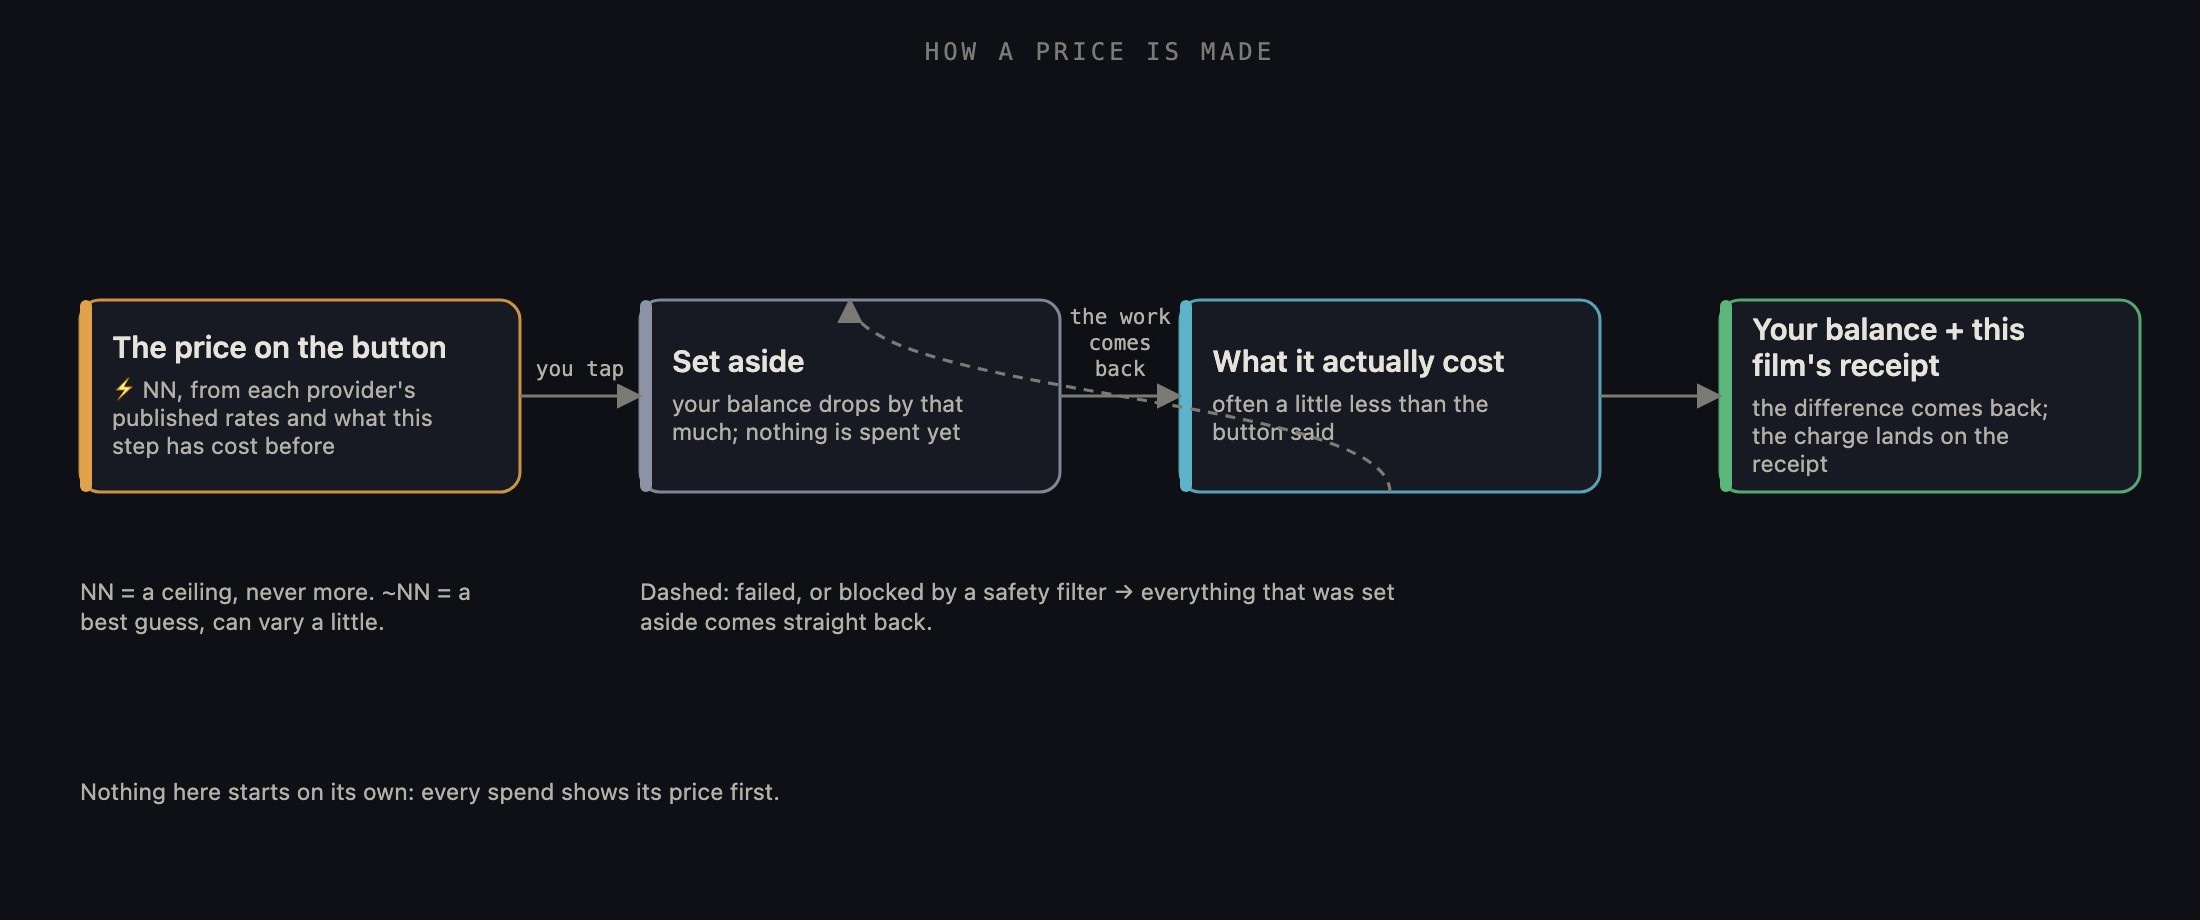
Left to right: the price on the button, the credits set aside while the step runs, and what you actually pay once the work comes back.
1 · The credit pill and the doors in
The pill in the top bar shows your balance and rolls as you spend. Tap it and Plans & Credits opens; tap again and it closes (credit pill). The panel has other doors: Manage plan in Settings, the credits line on the shelf’s welcome card, and Get Credits, which appears wherever a step needs more than you have; buy a pack and the step carries on where it stopped. Before a big-ticket step, a small check shows the price beside what you have, with Continue to go ahead and a don’t show again box that only holds while you have enough.2 · Your plan and balance
The top of the panel names your CURRENT PLAN and your CREDITS. Under them, a line reads “Oldest N expire” with a date. Tap that line and it opens into your batches: Welcome credits, Plan credits, Purchased, each with what is left and when it expires, or “never expires”. The rule is in the panel’s footer: credits are valid for 12 months from purchase while your subscription stays active, or up to 6 months after you cancel.3 · Subscription Plans
Four cards, one per plan. Each shows its name, its monthly price, the credits it brings every month, and a line that turns those credits into roughly how many images or minutes of video. That line is a best case at the cheapest models we offer; your own films use what you pick. Your plan wears a CURRENT tag. The ⓘ on a card tells you what one credit works out to on that plan; bigger plans are cheaper per credit. Choose starts the subscription through the App Store. Tap a card anywhere but its button to compare: the card rings and the packs row below switches to that plan’s pack prices. Studio+ is a different deal, no credits at all: you connect your own accounts with each AI provider and pay them directly, and the subscription covers the studio itself. Its button reads Soon; it is not on sale yet.4 · Credit Packs
Once you are on a plan, a row of packs sits under the plan cards: Small, Medium, Large, XL. Each shows its price, its credits, the same ”≈” line, and its own ⓘ for the per-credit maths. Pack prices follow the plan you are on, so a higher plan buys the same pack for less; that is what the compare tap is for. Buy goes through the App Store and the credits land on your balance. On a higher plan’s packs the button reads Upgrade to buy: it upgrades your plan first, then buys the pack. A lower plan’s packs show greyed, for reference only. If Get Credits sent you here, the smallest pack that covers what you were short wears a “covers it” tag; one tap on its Buy and back you go.5 · Provider Costs
Below the packs, PROVIDER COSTS fills the rest of the panel: a spreadsheet of every published price, one row per model, size and length. Columns run provider, type (Image, Video, Audio, Writing), model, version, resolution, aspect, length, quality, the unit the price is per, and credits. The ⓘ tells you where the numbers come from: the list refreshes every night from each provider’s published prices, so it is today’s snapshot, not a locked quote. To find a row, type in the search field: any word from any column works, and two words narrow to rows with both (“seedance 720p”); the × empties it. The filter button opens three columns of ticks, provider, type and picture shape; ticks in one column widen the list, ticks across columns narrow it, and the button counts how many are on. Clear drops them all. Tap the PROVIDER, TYPE or MODEL header to sort A to Z; tap again for Z to A. Two short explainers travel with every price in the app, behind the ⓘ beside each model picker. How we calculate cost is the estimate rule above. How we calculate shot length is why a video shot costs what it does: video models only sell whole seconds, so a shot rounds up to cover its time in the edit, and a little extra, the handles, gives you room to slip the clip later. In the Editing Room that same ⓘ names the exact length of the shot in front of you.6 · The marks beside every model
Every model picker in the app shows a small mark next to each model’s name. It says what that model’s provider may do with what you send them: three marks, from terms that allow training on your material, through terms that do not commit either way, to no training on what you send. Every mark rests on something we can point to, the provider’s terms or a setting we hold with them, never a guess, and the marks wear the same colours everywhere. The full key is Model marking key; it also opens from the ⓘ beside any model picker, with the Privacy Policy one tap away.7 · This film’s receipt
Open the panel from inside a film and a receipt runs down the right-hand side, headed CREDIT DEDUCTIONS with the dates it covers. Every charge on this film is there, grouped by the room it happened in, in pipeline order: Writers Room, Recording Booth, Script Breakdown, Director Review Board, Storyboard, Timeline, Reference Board, Continuity. Each line names the kind of spend, how many times, and the credits, with a subtotal per room. Anything that came back sits under REFUNDS with a plus sign. At the foot, TOTAL CREDITS DEDUCTED, then REAL COST BY PLAN: the same spend priced at each plan, yours highlighted, so you can see what this film would have cost on a bigger or smaller plan. The share button at the top exports the receipt as a spreadsheet. For where credits went across all your films, the Spend Report on the Project Shelf tells the same story as bars.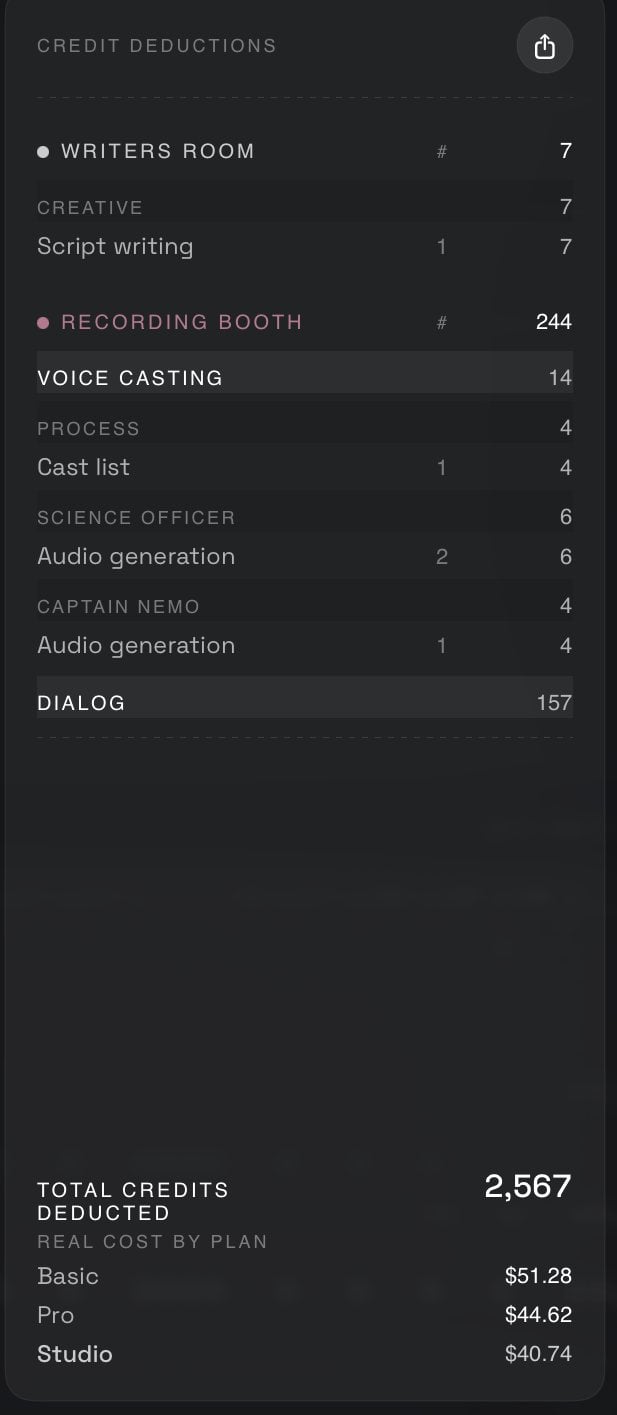
The receipt column inside a film: charges grouped by room, refunds with a plus, the total, and the same spend priced at each plan.
8 · Managing the subscription
The bottom of the panel is the paperwork. Cancel Subscription asks you to confirm; you keep your plan to the end of the billing period, then the account drops to Free. If you subscribed through Apple, it opens Apple’s Subscriptions page instead, where the cancel lives. Terms and Privacy open the documents here in the app. Restore Purchases brings back a plan or packs already bought on this Apple ID, say on a new iPad. If the plans do not load, Retry tries again.What happens next
Credits is the one room you visit from every other. Its neighbour is Settings, where you set the default model each room uses, which is what sets the price on the buttons, and where your own provider keys are kept. Back on the Project Shelf the same pill shows the same balance over all your films, with the Spend Report a tap away.This page mirrors the front page of the in-app guide. Inside Ozu, tap ? on the Project Shelf for the guide, or the ⓘ beside any control for that control’s own write-up.