

Where every sound goes
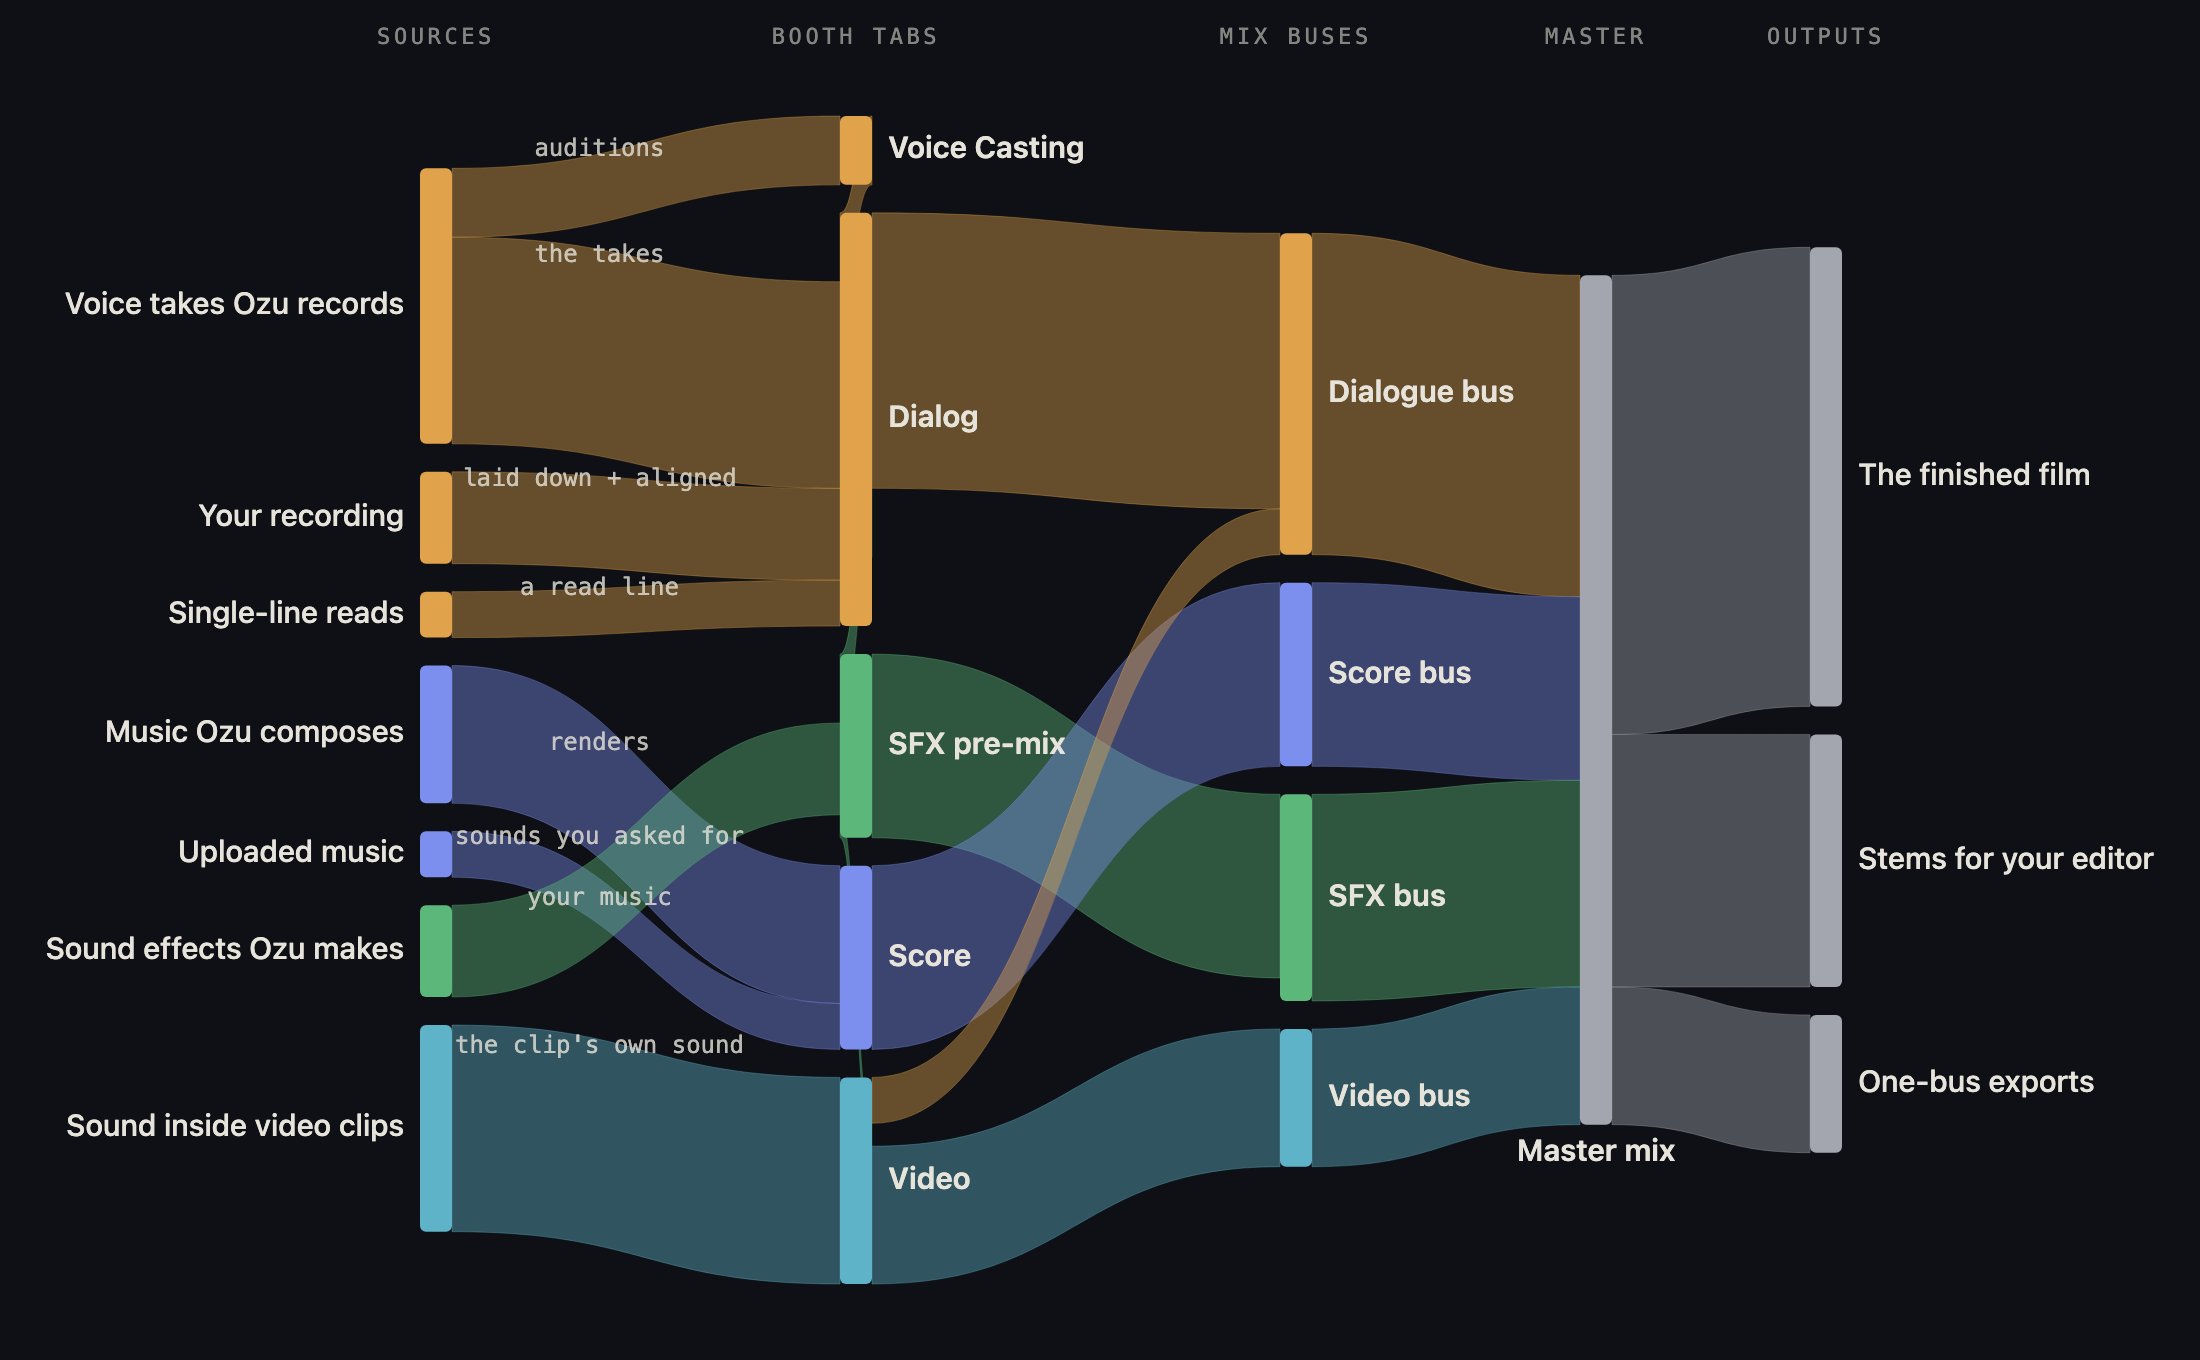
Follow one colour from left to right: where a sound comes from, which tab prepares it, which channel it lands on, and where it leaves the building.
1 · Voice Casting
Every speaking character in your script auditions here. Each character has a card; tap it and you hear their current audition. If a voice is not right for the film, tell Ozu what you want or change the voice description and ask for a new audition; the price is on the button. The test line each actor reads is yours to change. When a voice sounds right, say so to Ozu or tap the take you want; the checkmark shows who is cast. Nothing here is on the mix yet. Casting only decides who speaks. The arrow at the top takes your cast into the Dialog tab.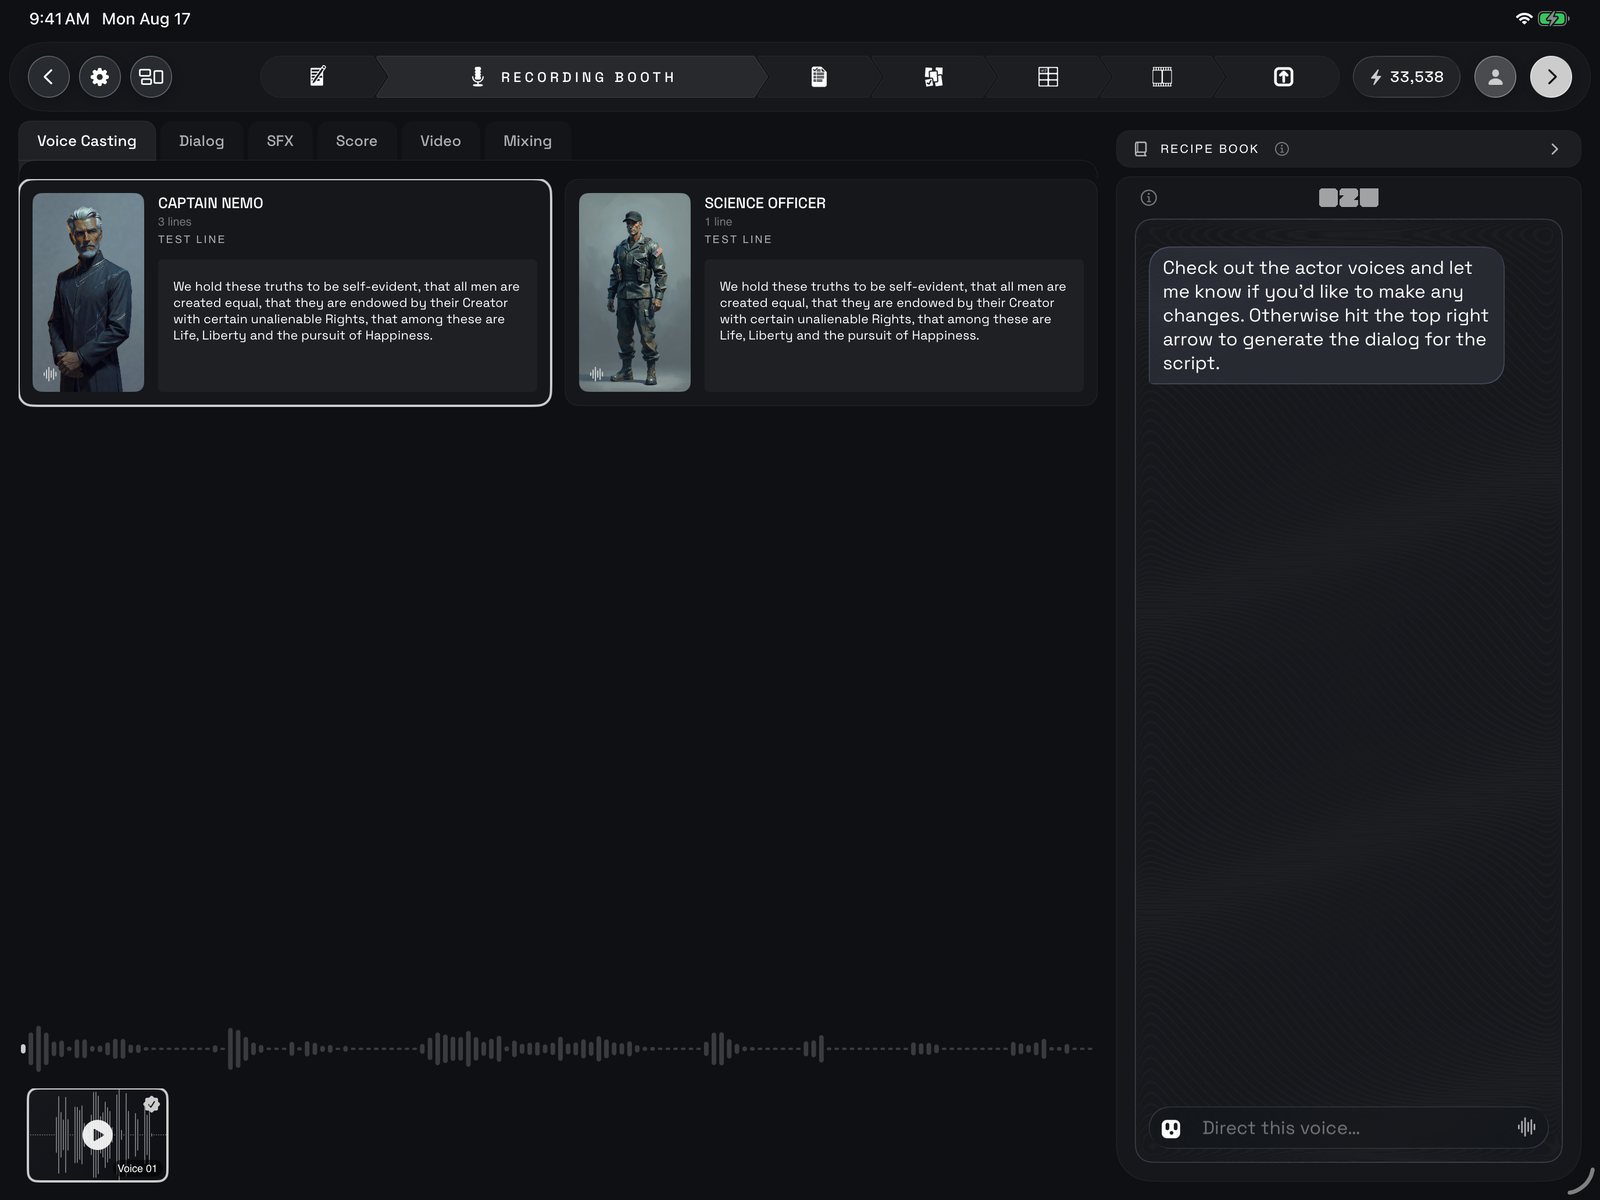
Voice Casting: a card per speaking character with the test line each actor reads, the audition strip along the bottom, and the Ozu chat on the right.
2 · Dialog
Your cast performs the script, scene by scene. Each scene chip shows that scene’s takes; play them and pick the read you want. The take you pick is what the film uses. Want a different performance? Give Ozu a note in the direction box and ask for a new pass; a scene still recording can be cancelled. If you brought your own recording, it is laid down here and lined up to the script.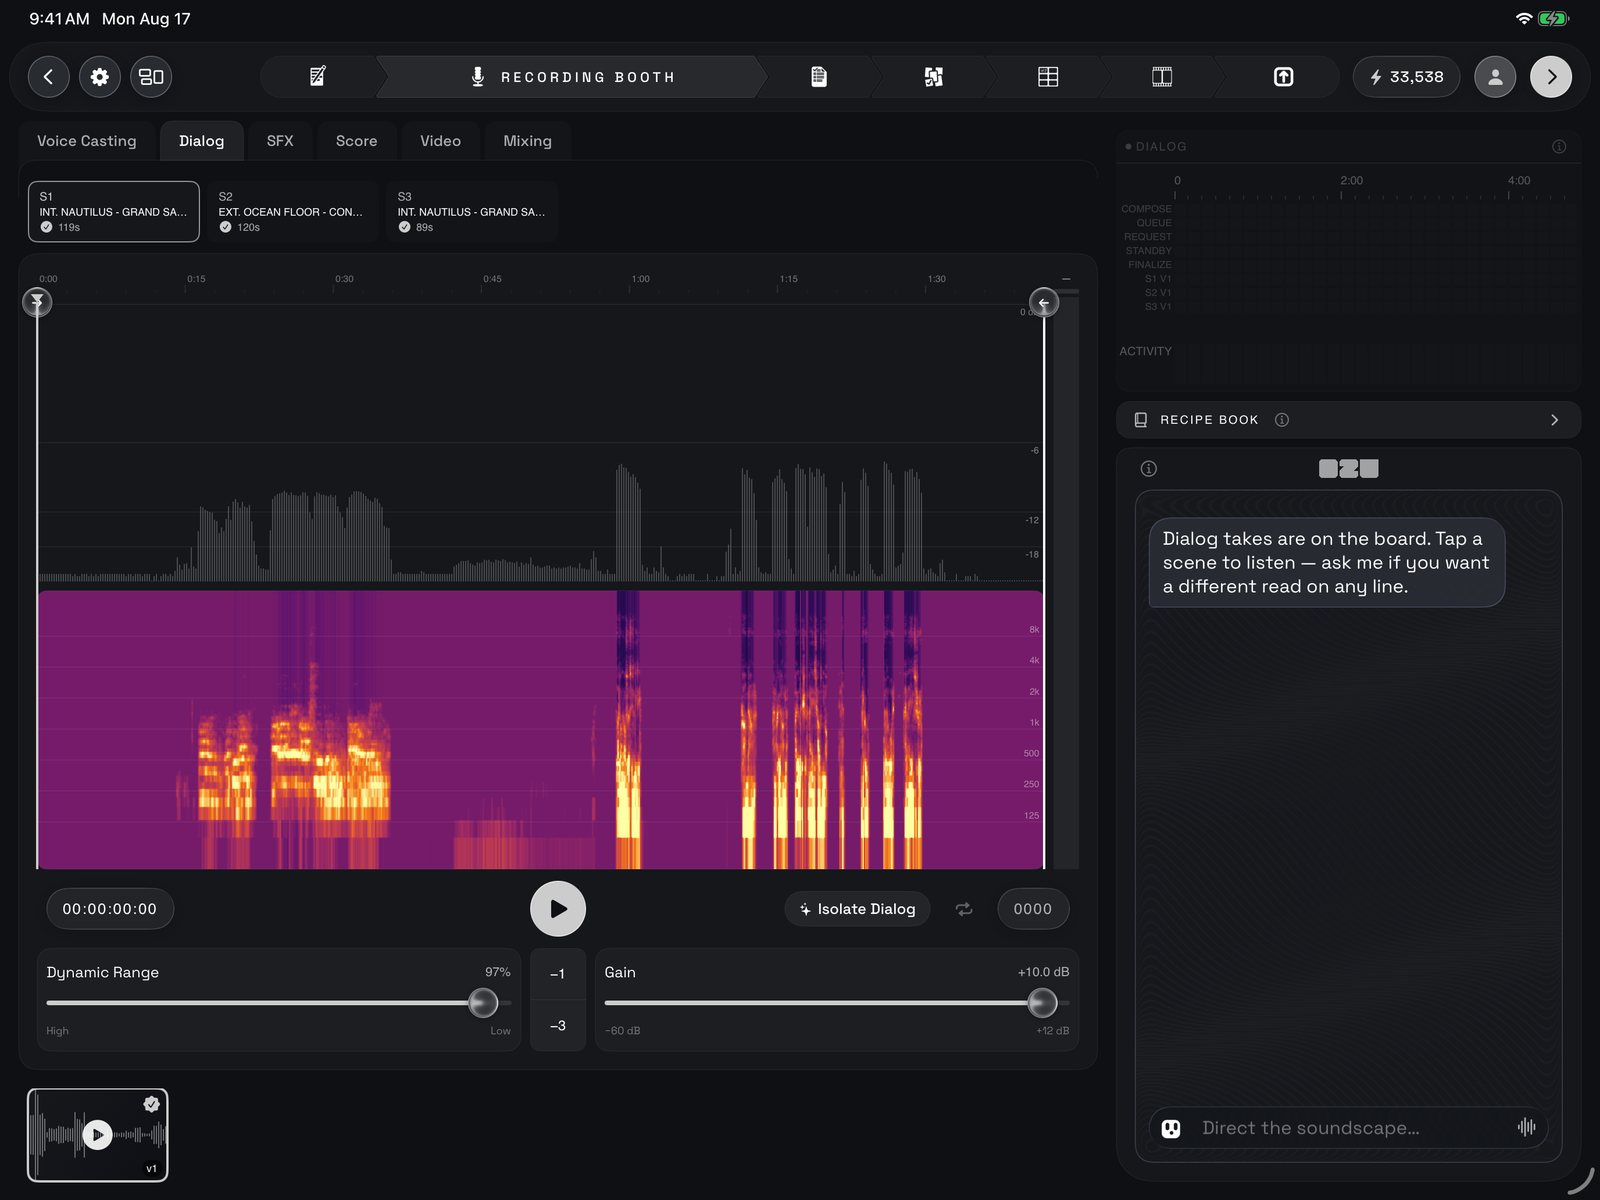
Dialog: the scene chips across the top, the chosen take's waveform and spectrogram, the transport with Isolate Dialog, and the Dynamic Range and Gain sliders under it; the take strip bottom left, Ozu on the right.
3 · SFX
The sound-effects room. Ask Ozu (bottom right) for a specific sound, such as a door, rain or a crowd, and he offers it as a proposal; choose a sound engine, tap Generate for the shown credits, hear it, then place it and it lands on the timeline at the playhead as its own lane. Anything split off a dialog take or a video clip lands here too. It works like a small mixing board: one strip per effect, a fader for level and a slider for left–right placement, with solo and mute on each. Tap a piece on the lanes to work on it; reset puts its level and pan back to normal. Along the bottom are play, previous and next clip, undo and redo, the time pill, the spectrum switch and the jog wheel, which scrubs the sound or slides the selected effect earlier or later. You hear the effects alone here; MIX plays them inside the whole film for context. The whole SFX channel’s overall level lives in Mixing. Full write-up: SFX Pre-mix.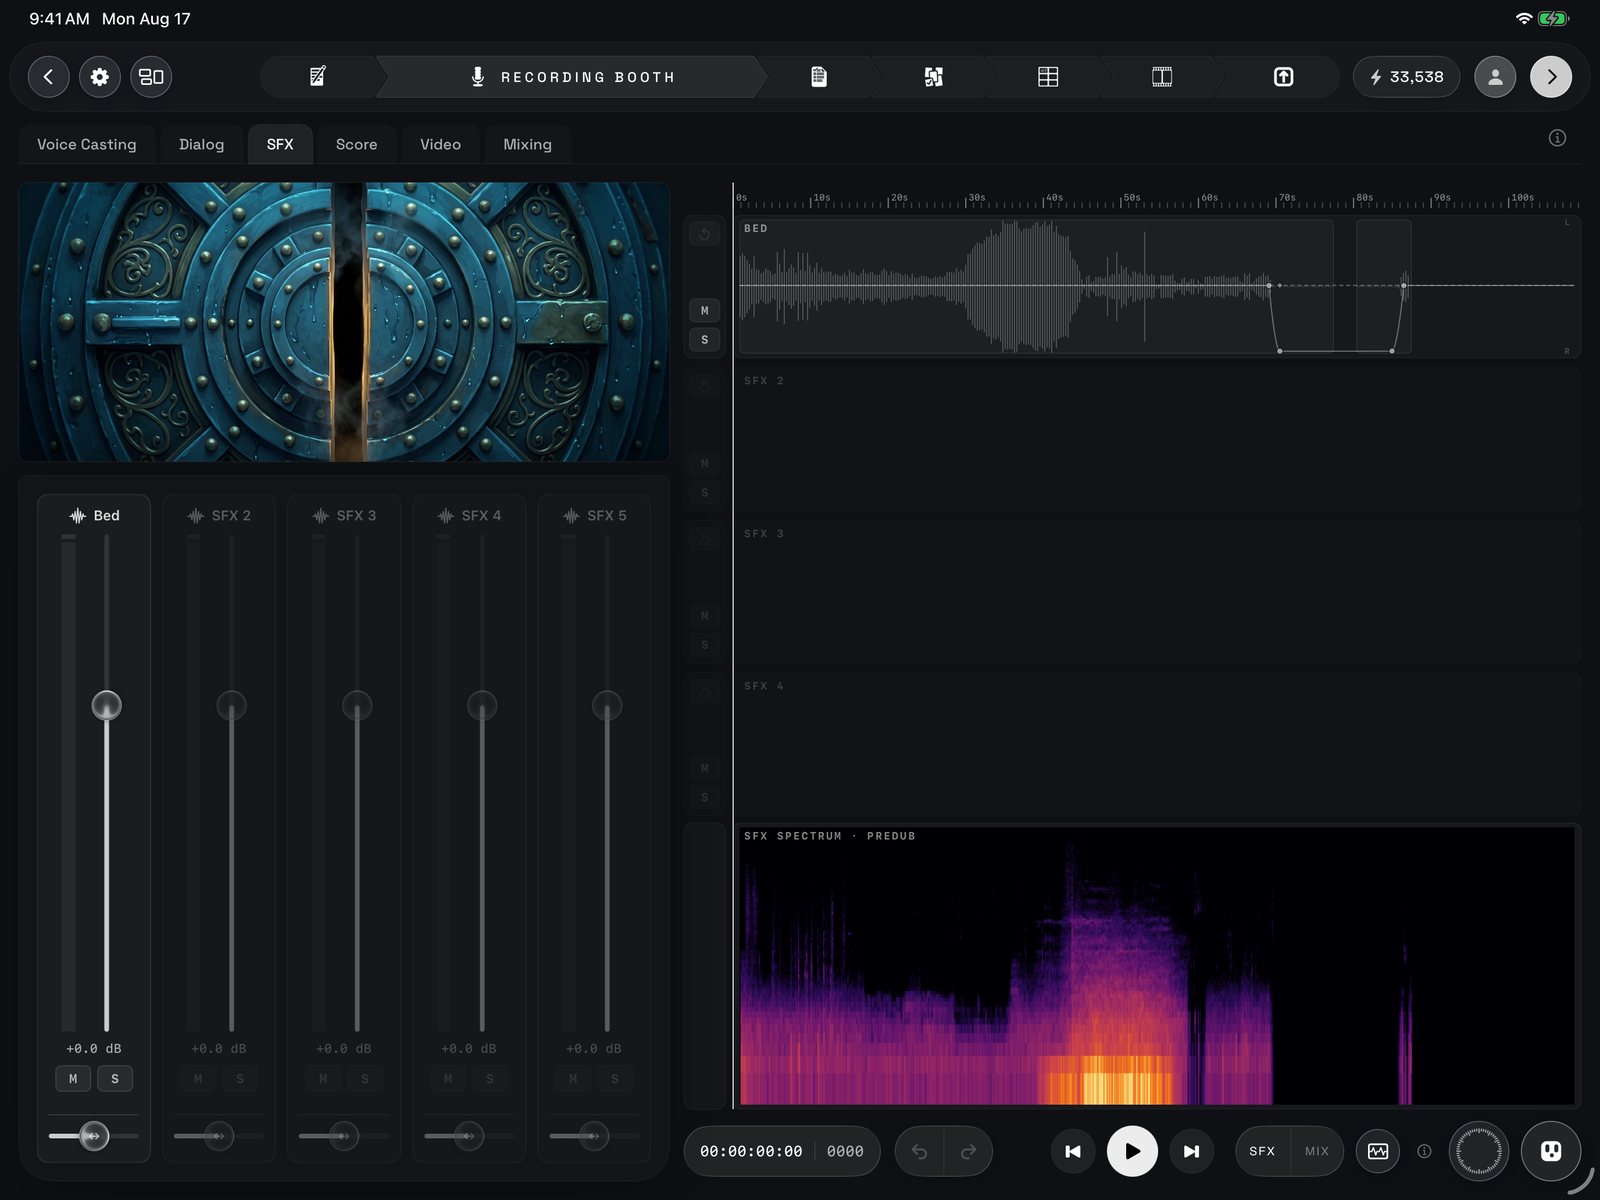
SFX: one strip per effect on the left (Bed first), the effect lanes with M/S on the right, the SFX spectrum underneath, and the footer with the SFX / MIX listen switch and the jog puck.
4 · Score
Ozu composes music for the film scene by scene. Each scene has a music direction you can read (hold to copy it), and takes you can play. To change a scene’s music, redirect it (your next chat message becomes the note for that scene) and ask for new takes; you can choose the music model and how many to render. Pick the take you want and it becomes the film’s score. If you passed on music earlier, Score renders one now. Your own uploaded music lands on the same channel.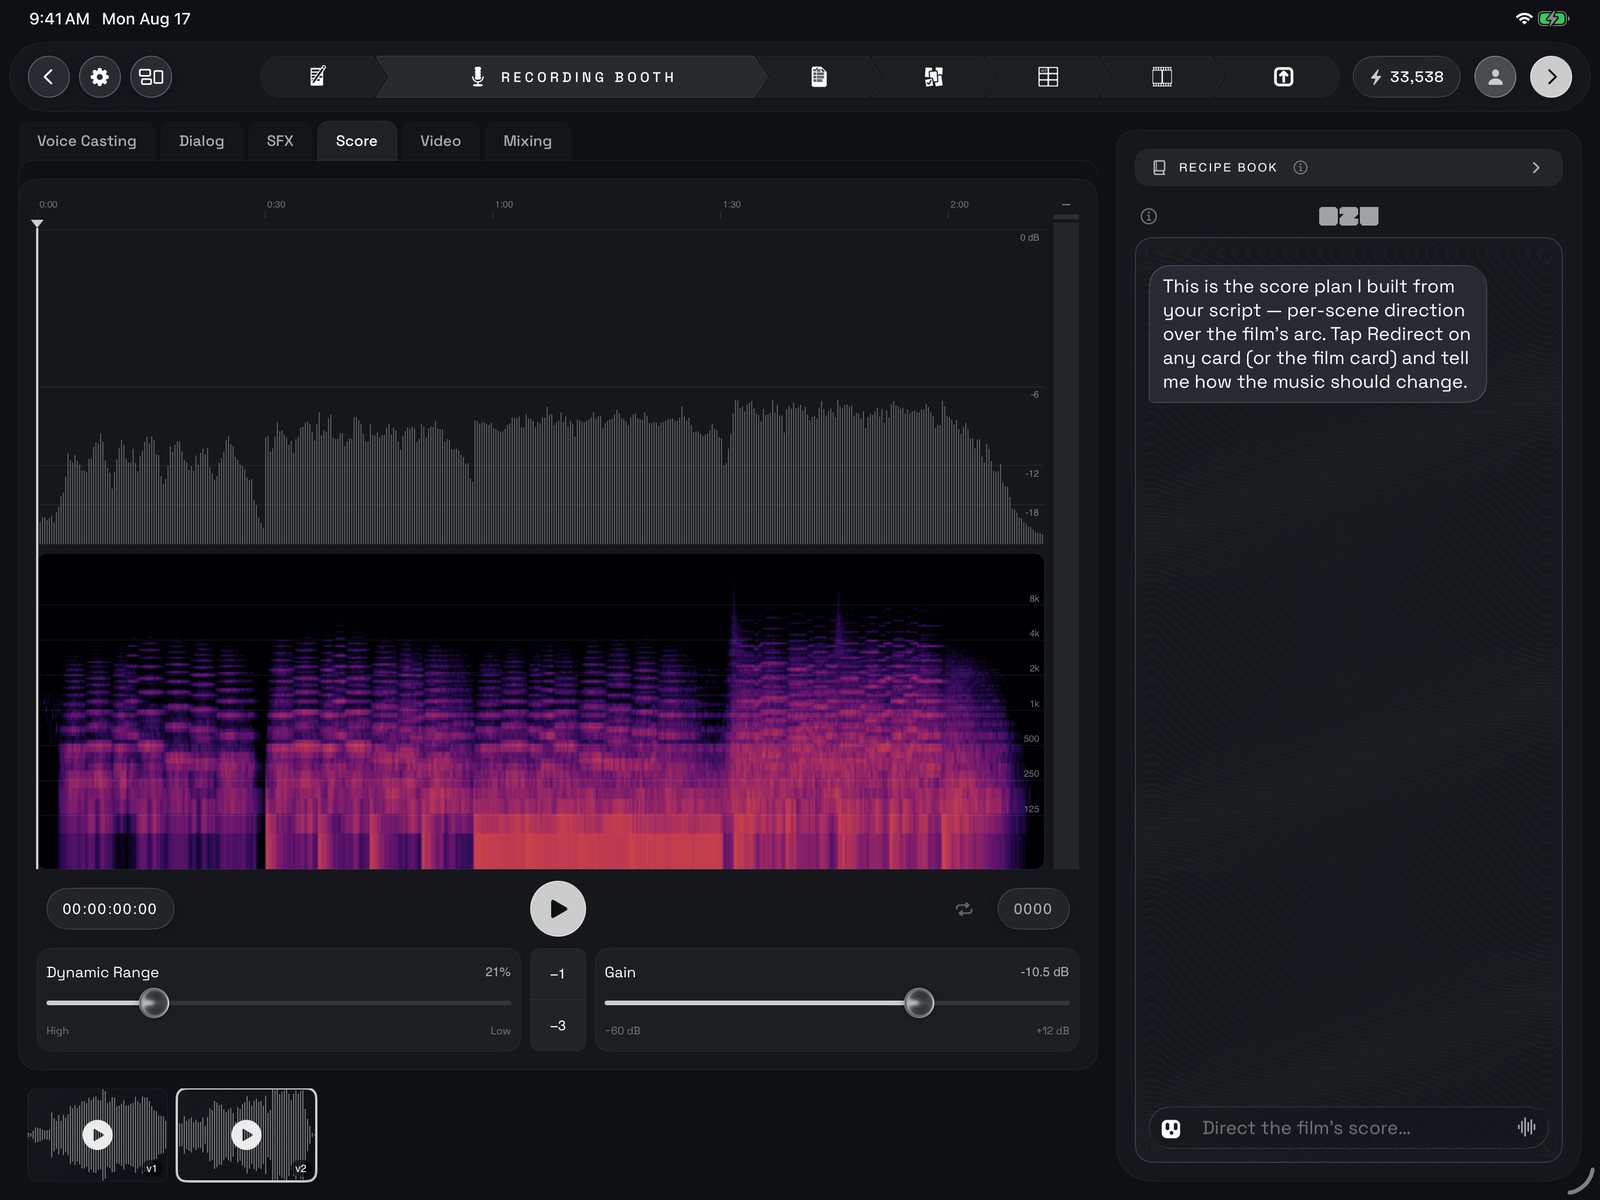
Score: the pinned score take's waveform and spectrogram, the transport, Dynamic Range and Gain, the take strip bottom left, and Ozu on the right with the score plan.
5 · Video
Your generated video clips arrive with their own sound: footsteps, wind, a line spoken on camera. This tab is where you tidy it. Down the side is every beat with video, in the same order as your timeline; tap a clip and it plays in the viewer above Ozu. Clip Gain turns just that clip up or down and travels with it, and dynamic range evens out its loud and quiet moments. Clean Dialog quiets everything but the speech in a clip; Restore Original puts the clip’s sound back. Anything you do here holds in the final mix, where all the clip sound is one channel.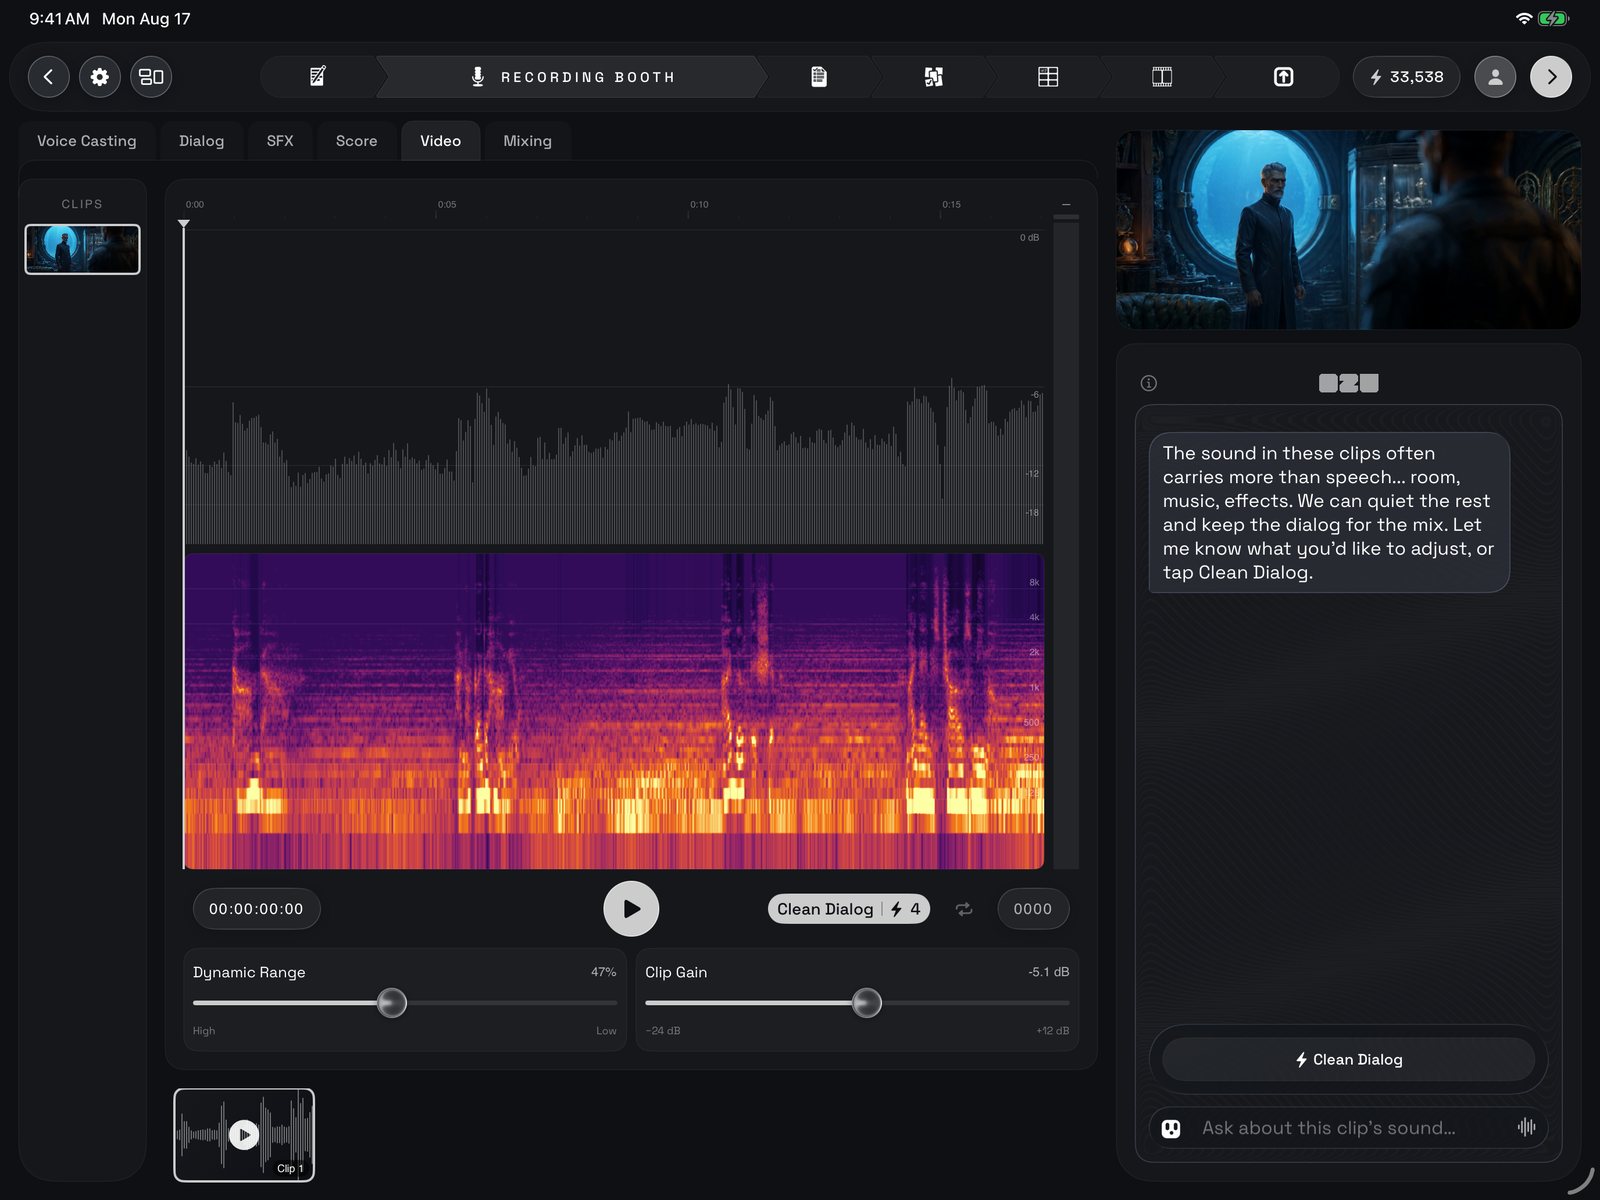
Video: the clip column on the left, the selected clip's sound in the middle with Clean Dialog on the transport and Clip Gain under it, the clip playing in the viewer above Ozu on the right.
6 · Mixing
The board. Four faders (Dialogue, Score, SFX, Video) and a Master. Faders set how loud each channel is, M and S silence a channel or play it alone, the top slider places it left or right, the lower slider evens out loud and quiet moments, and EQ shapes tone. Ducking pulls the music and effects down while someone is speaking; Smart Balance sets a sensible starting mix in one tap; Stage puts each channel’s loudest moment at a safe level. The Master column does all of this to the whole film at once. What you hear here is what exports: as the finished film, as stems for your editor, or one channel at a time. Full write-up: Mixing.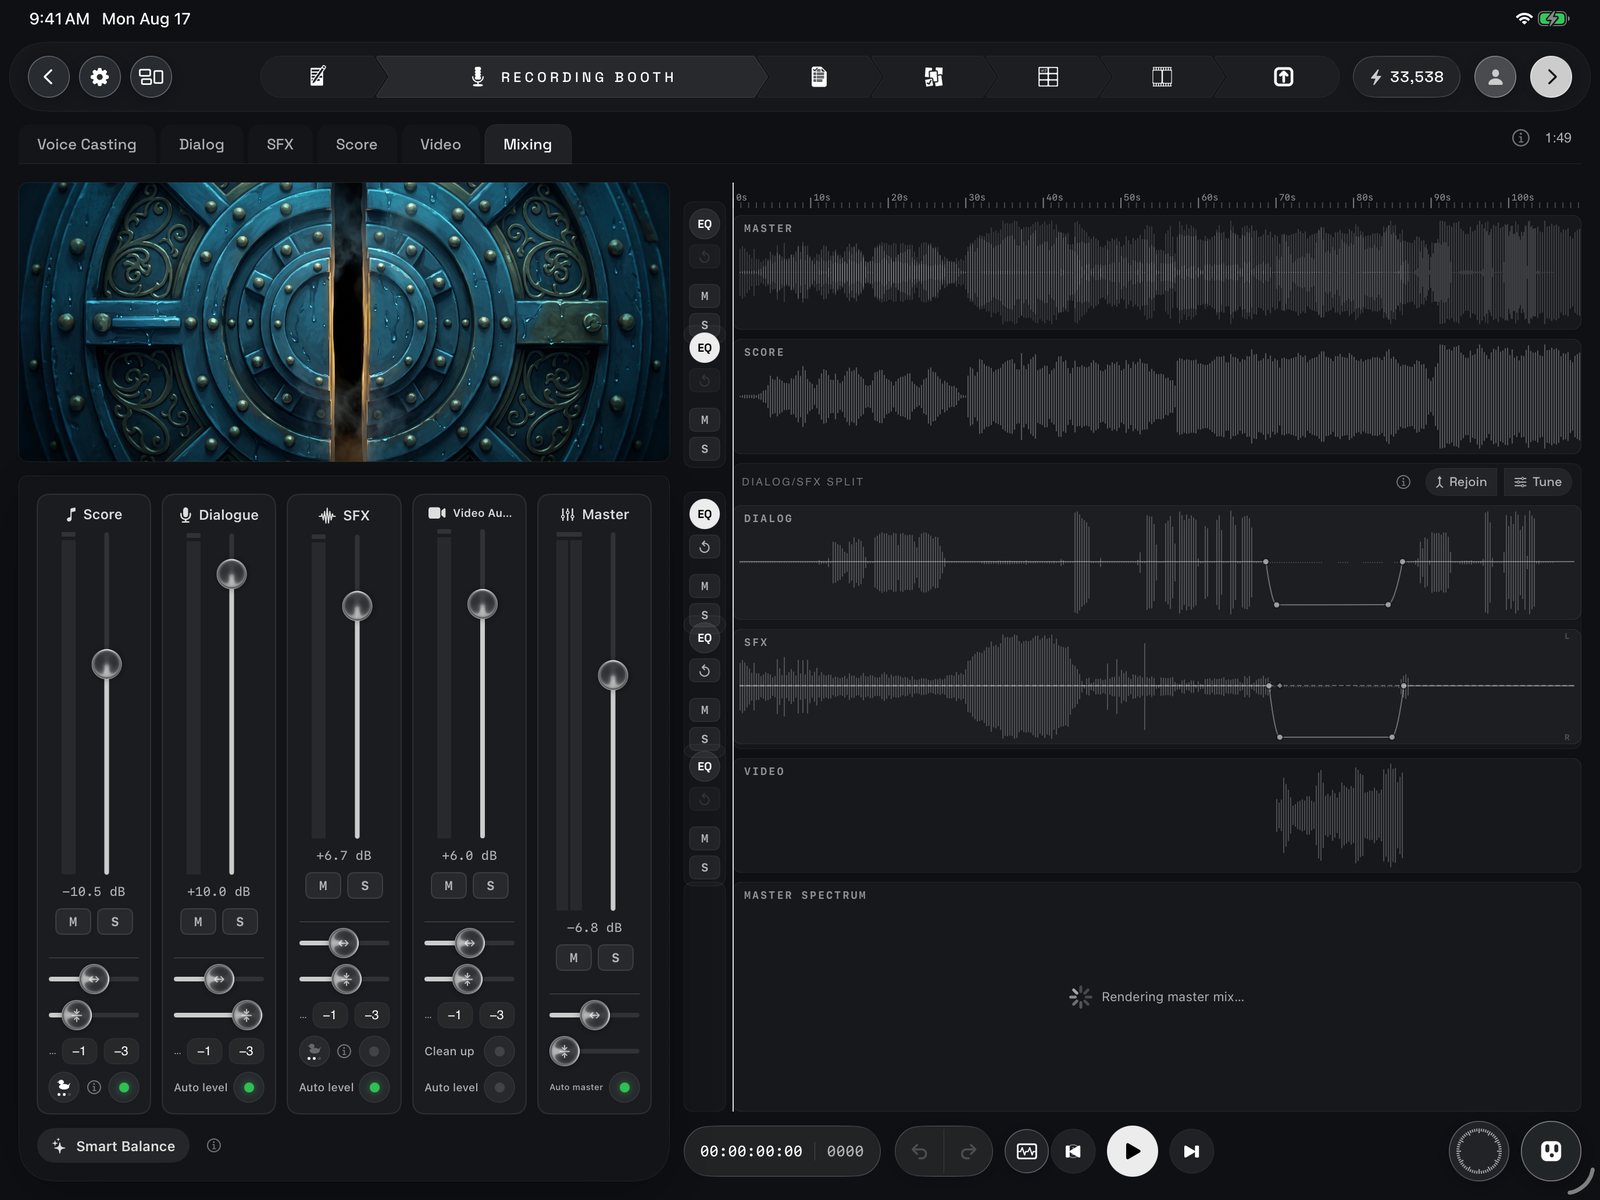
Mixing: the five strips (Score, Dialogue, SFX, Video Audio, Master) with faders, pan, Range and Stage; the lanes with EQ / M / S on the right; Smart Balance bottom left; transport and jog bottom right.