

Where the board’s pictures go
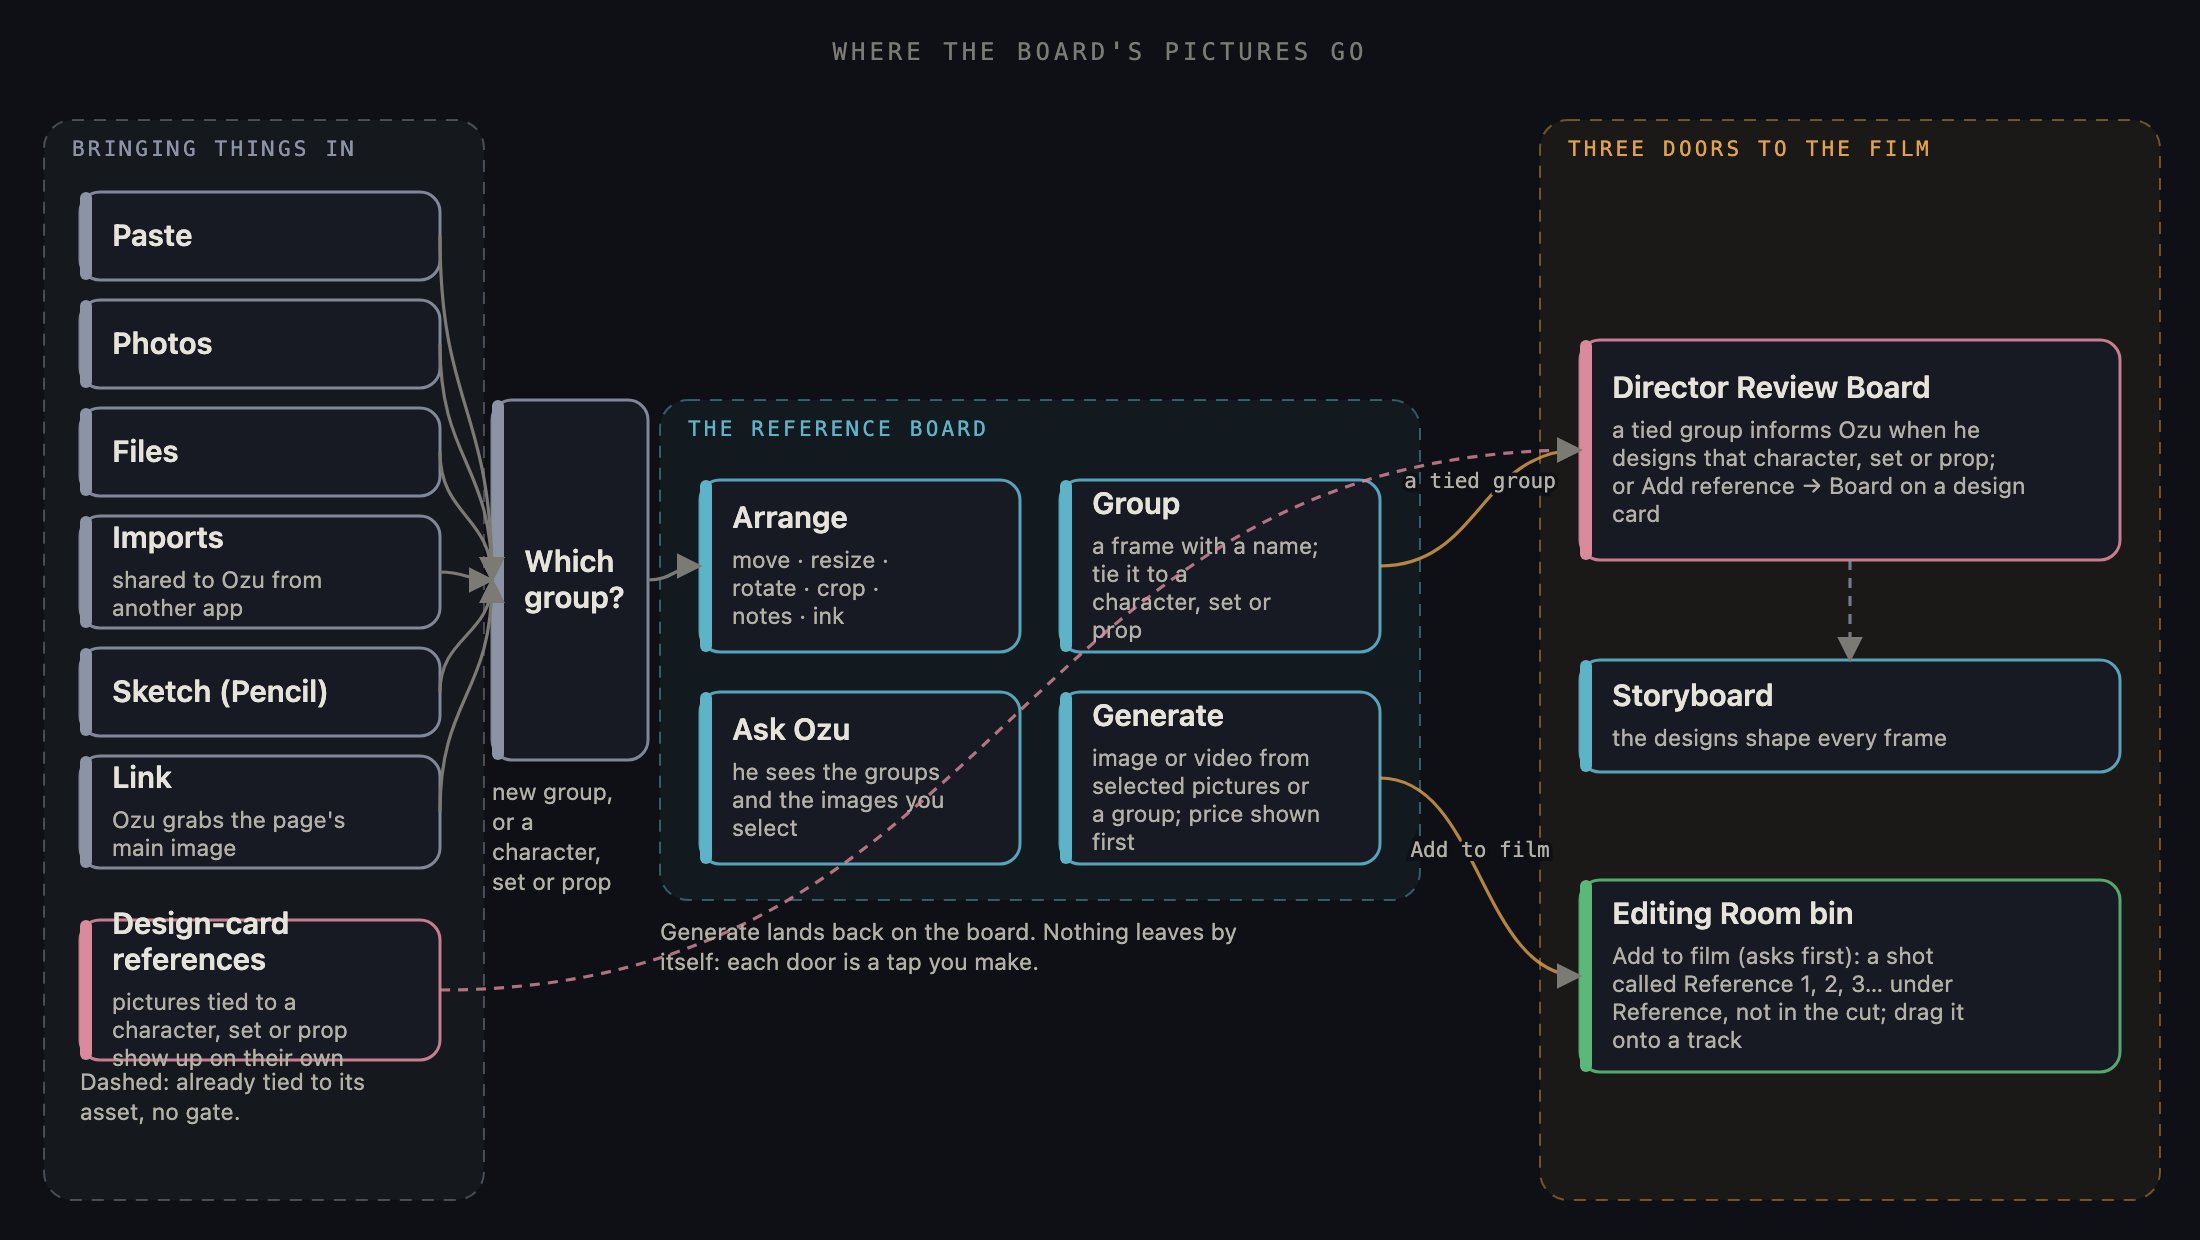
Read it left to right: how a picture gets onto the board, what you do with it there, and the three doors it can leave through.
1 · Getting around
The board is a dark dot grid that goes on forever. Drag empty space to move, flick to coast, pinch to zoom, tap empty space to deselect. When the board outgrows the screen a minimap appears top right; drag on it to jump. Beside it, the zoom pill: frame everything fits the whole board on screen, the slider zooms from 25% to 300%, the readout taps back to 100%.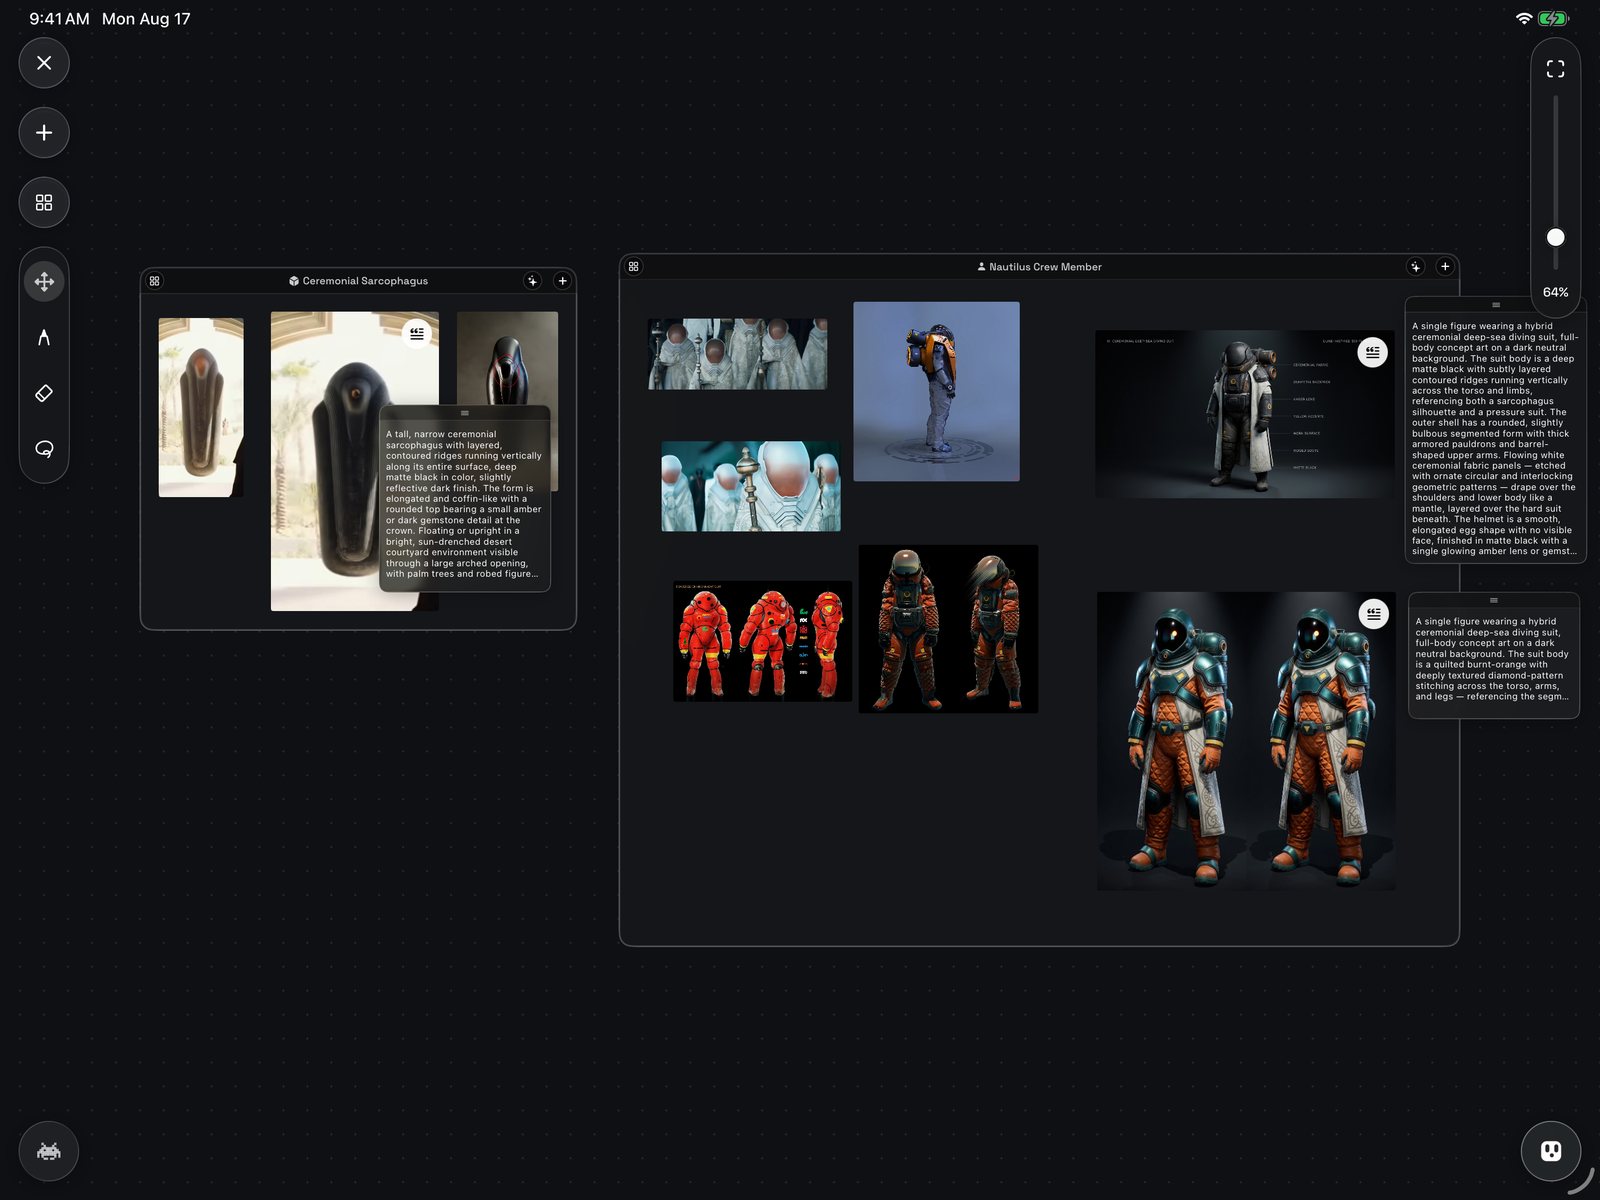
The whole board with a few groups, the tool column top left, the zoom pill and minimap top right, and Ozu's button bottom right.
2 · Bringing things in
The ➕ button at the top of the tool column fans out every way in. Paste takes what is on your clipboard. Photos and Files open the pickers you know. Imports is the inbox for pictures other apps have shared to Ozu, so a Procreate export is waiting here; tap a cell and Add it. Sketch opens a full-screen sketch pad with the Pencil tools; Done puts the drawing on the board, and you can reopen it later. Link takes a web address; Ozu grabs the page’s main image and pins it with a link back. Each of these asks where the picture should live first: name a new group and create it, or pick a character, set or prop from your breakdown and the group is made and tied to it in one go. Two shortcuts skip the menu: drop a picture or link from another app and it lands under your finger, or hold on empty space to open the same choices right there. Two more things ride the ➕ menu. Note drops a sticky note: tap once to select, again to type, drag the grip to move it, the puck to resize it, hold to delete. New group makes an empty frame to fill later. And any picture you attach to a character, set or prop on its design card shows up here on its own, in a group tied to it.3 · Working an image
Tap an image to select it; tap more to select several. Selected images are what Generate and Ozu look at. Drag to move one; where it lands decides which group it belongs to. With one image selected, pinch resizes it and a two-finger twist rotates it, snapping to quarter turns. A small bar appears under it: Crop opens a frame you can drag and resize, and Crop again makes a new image beside the original, which stays as it was. Fullscreen shows it big (X to come back), Save puts it in your Photos library, and Delete takes it off the board with no confirmation. Hold an image for its menu: Ask Ozu about this, Move to group, Delete. Any image Ozu made carries a prompt sticky, the prompt behind it on a note you can drag and resize that stays tied to its picture.4 · Groups
A group is a named frame, and it is how the board talks to the rest of Ozu. Whatever sits inside the frame belongs to the group; drop an image in and it is a member, drag it out and it is not. Drag the header to move the whole group and everything in it; drag any edge or corner to resize it.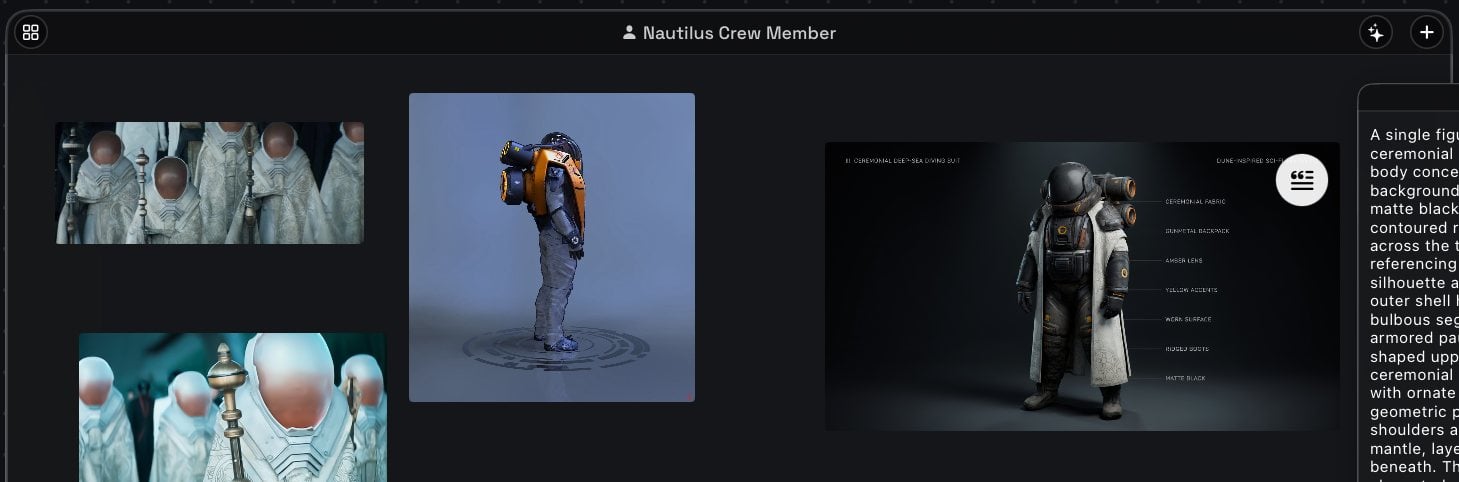
A group frame close up: the tied name in the header (Nautilus Crew Member), the layout button on the left, Generate ✦ and Add + on the right, and the pictures and notes inside.
5 · Ask Ozu
The round button bottom right opens a chat with Ozu about your board. He can see the groups and, when you select images, the pictures themselves: whatever is selected rides along as thumbnails on your message, and you can drop one or all of them before you send. Ask what a group has in common, for a description of a character’s look from her references, or what is missing. Tap a thumbnail in the conversation and the board glides to that picture. When Ozu suggests an image or a video, a Generate this chip takes his prompt to the same confirmation the Generate button uses, so you see the price first. The same button closes the chat. Bottom left, the Waiting Game is there for while a render finishes.6 · Generate
Select one or more images and a Generate button appears at the bottom of the screen. Ozu reads the board and writes a prompt from your selection, then a confirmation opens. At the top is the prompt (hold to copy); Tweak the prompt turns it into a text box. Under it, how many references are going along, and the image model: xAI gives one picture, Midjourney gives options. For a video, a video model picker and a length slider take their place, and the reference limit and price follow the model. Then the estimated cost; nothing is charged until you tap Generate. Don’t ask again this session skips this confirmation until you close the app; retries still ask, because a retry spends again. The result lands on the board. An image appears beside the references it came from, or inside the group when you used the group’s ✦, with its prompt sticky attached. A video puts its card down first, spinner and timer in the middle, and you can move and group it while it renders; when it lands, the card plays. If a render fails, Retry on the card runs the same request again, price on the button. Everything made here is a reference; it does not change your cast, sets or storyboard on its own.7 · Sending a picture on
Three doors lead out. First, the tied groups above. Second, from a design card in the Director Review Board, Add reference → Board opens this board as a picker: tap the images you want (up to that model’s limit; the counter at the top keeps score), then Use them or close without choosing. They become references on that card’s next design. Third, a finished video card wears an Add to film badge. It asks first, because it changes the film: Add to film makes it a shot called Reference 1, Reference 2 and so on in your project’s bin, under Reference, not in the cut, so nothing moves until you drag it onto a track; Not now keeps it on the board only. If the board will not load, a retry chip appears at the top; tap it to try again.What happens next
The board is not a step in the pipeline; it sits beside every room, and you can come back to it any time from the top bar. Its pictures reach the film through the Director Review Board, where tied groups and picked references shape the designs, and those designs shape every Storyboard frame after them. A video you add to the film waits in the bin of the Editing Room until you cut it in.This page mirrors the front page of the in-app guide. Inside Ozu, tap ? on the Project Shelf for the guide, or the ⓘ beside any control for that control’s own write-up.